In this section we will walk-through powering a kiosk up, moving through the Check-Ins program, and shutting a kiosk down.
Be warned, each of these steps can take an unusual amount of time. Each step can take as much as 60 seconds before you get any feedback on screen that you have clicked an icon, started a program, anything... So, just remain patient and give this little fella the time he needs to get his act together.
The kiosks should be powered down after the second service has begun each Sunday. Then at the beginning of each Sunday they must all be powered on.
Note that you should zoom in on this page to make the images more readable.
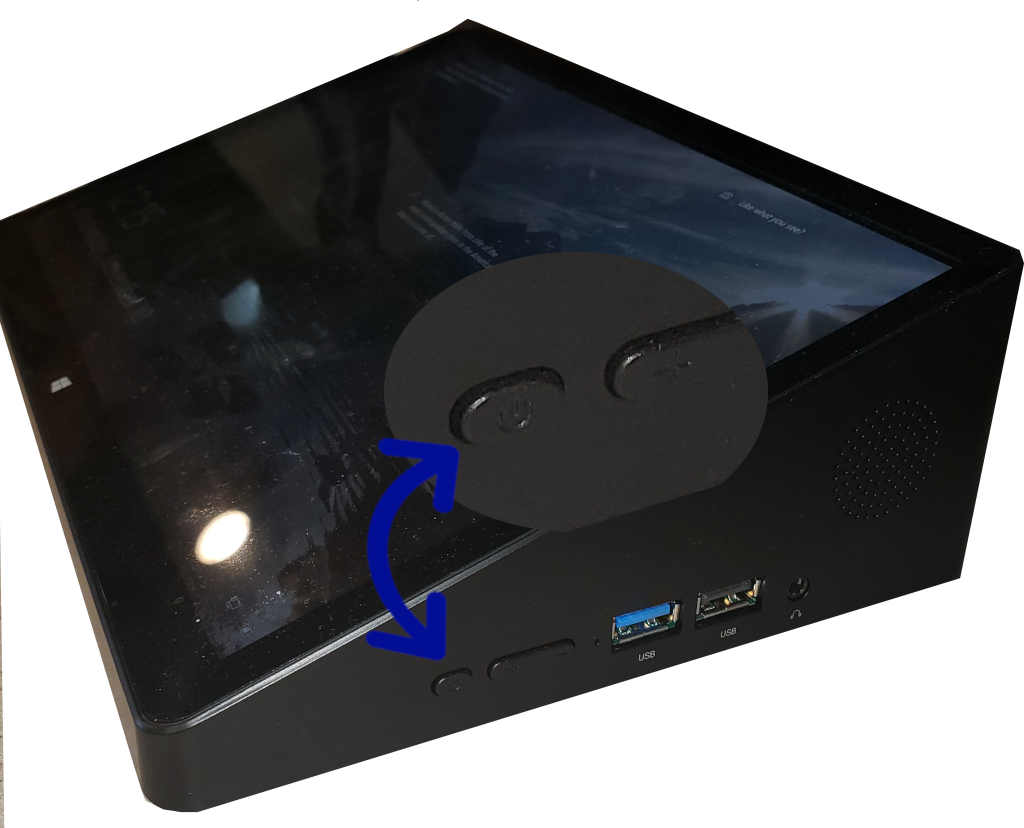 | This shows the right side of a Kiosk when facing one. Notice that on the side, the closest button to you is the power button. When powering up a kiosk, you will need to press and hold that buttion for as much as 15 seconds. Hold the button until you hear a beep. They you can release the button and the machine will begin powering up. |
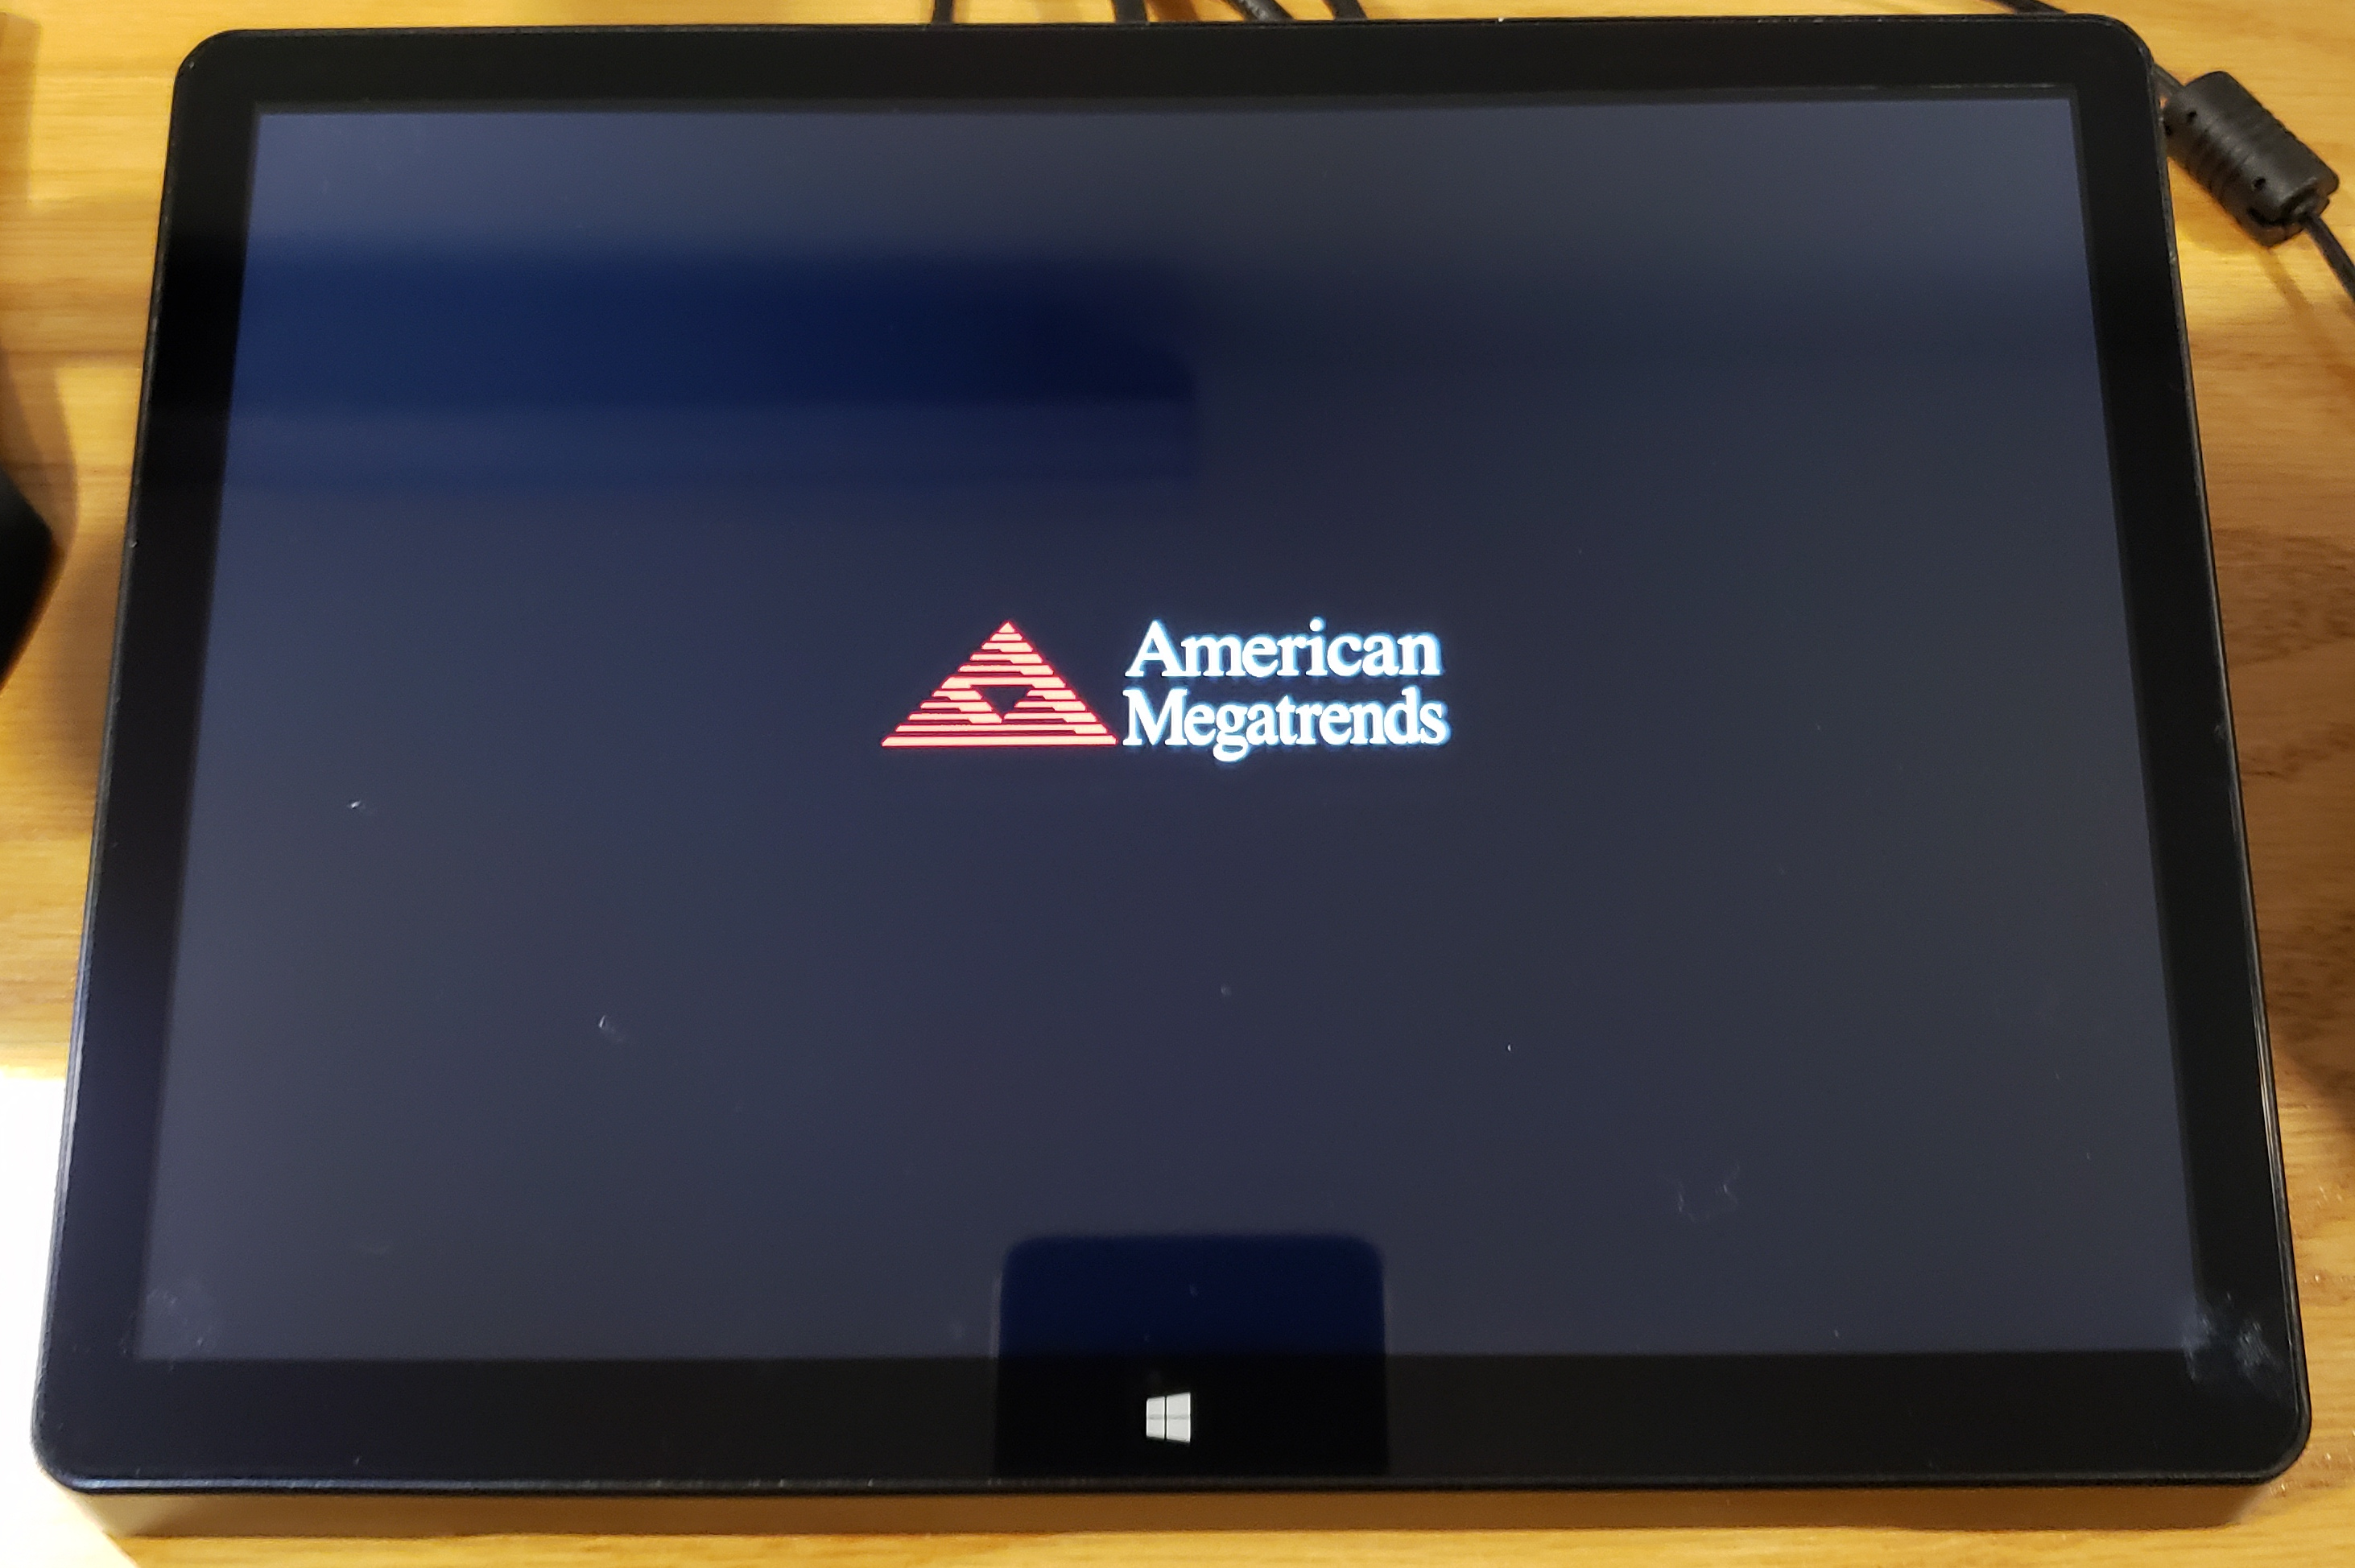 | Initially, you will see this logo on screen. That means the machine is powering up fine. When prompted to log into Windows, use the pin number, '1188'. You do not need to press the enter key. |
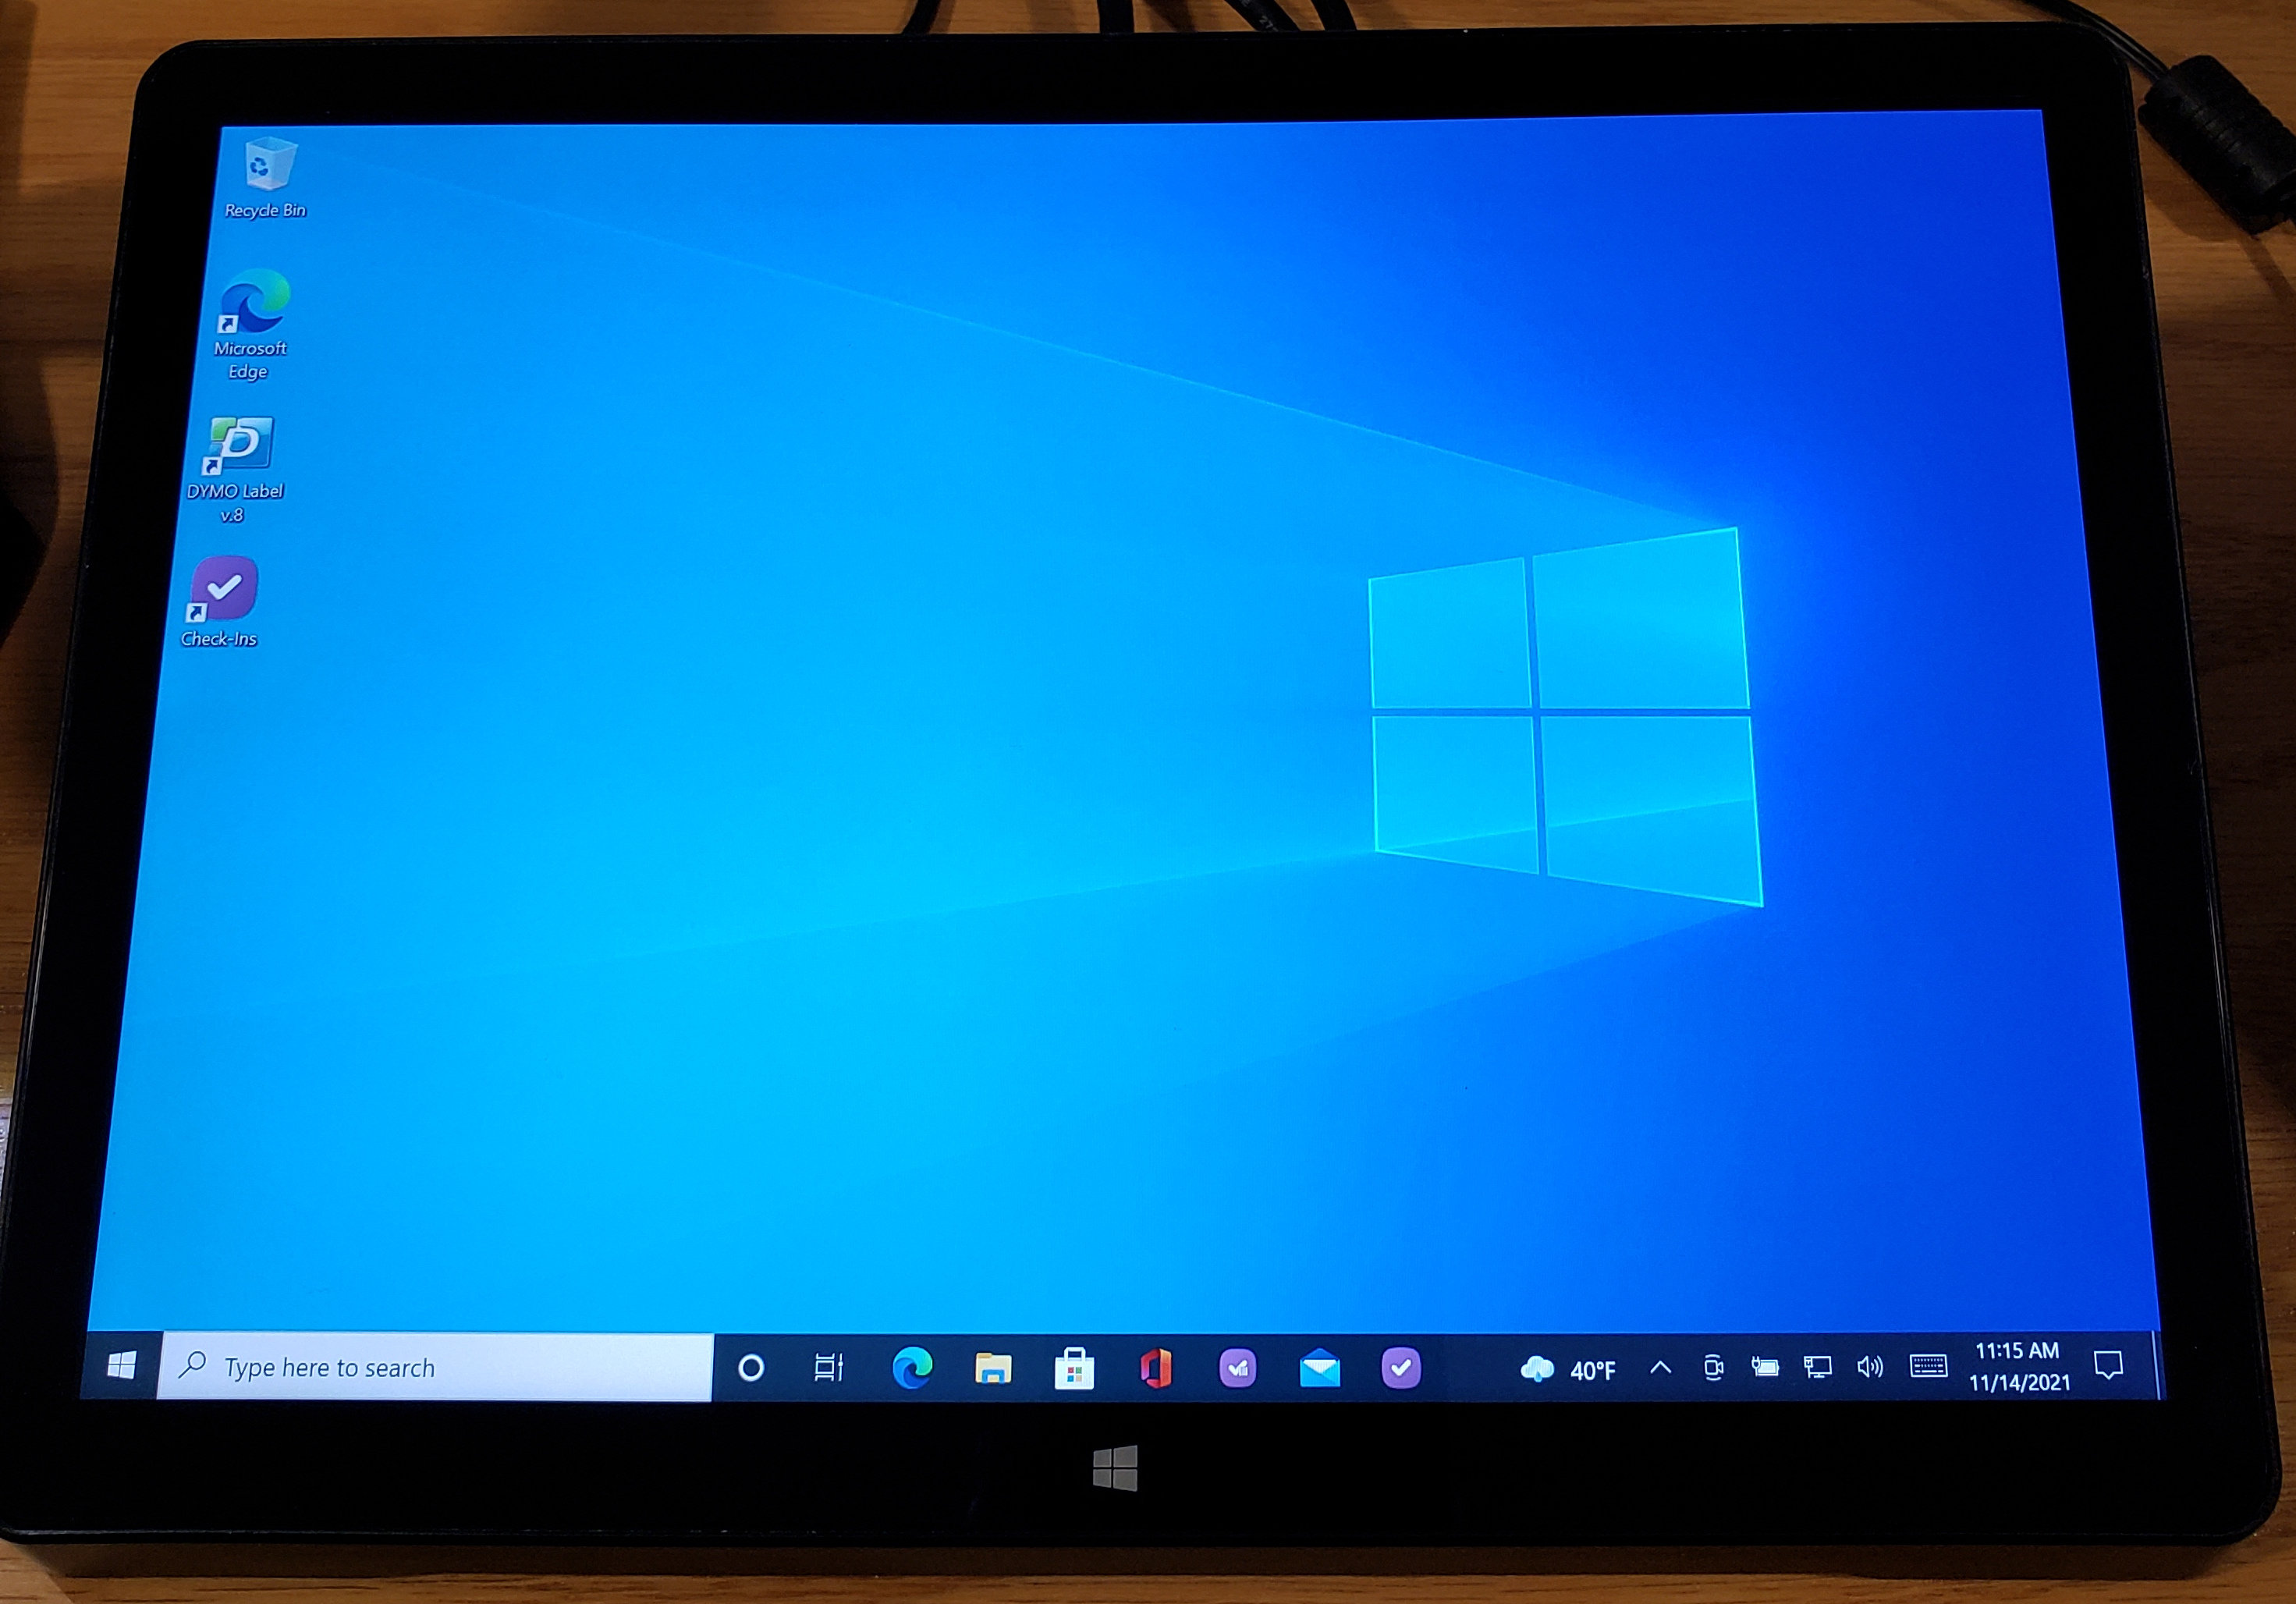 | This is the Windows desktop. Here you would launch the Check-Ins program either from the desktop or the command panel across the bottom of the screen. |
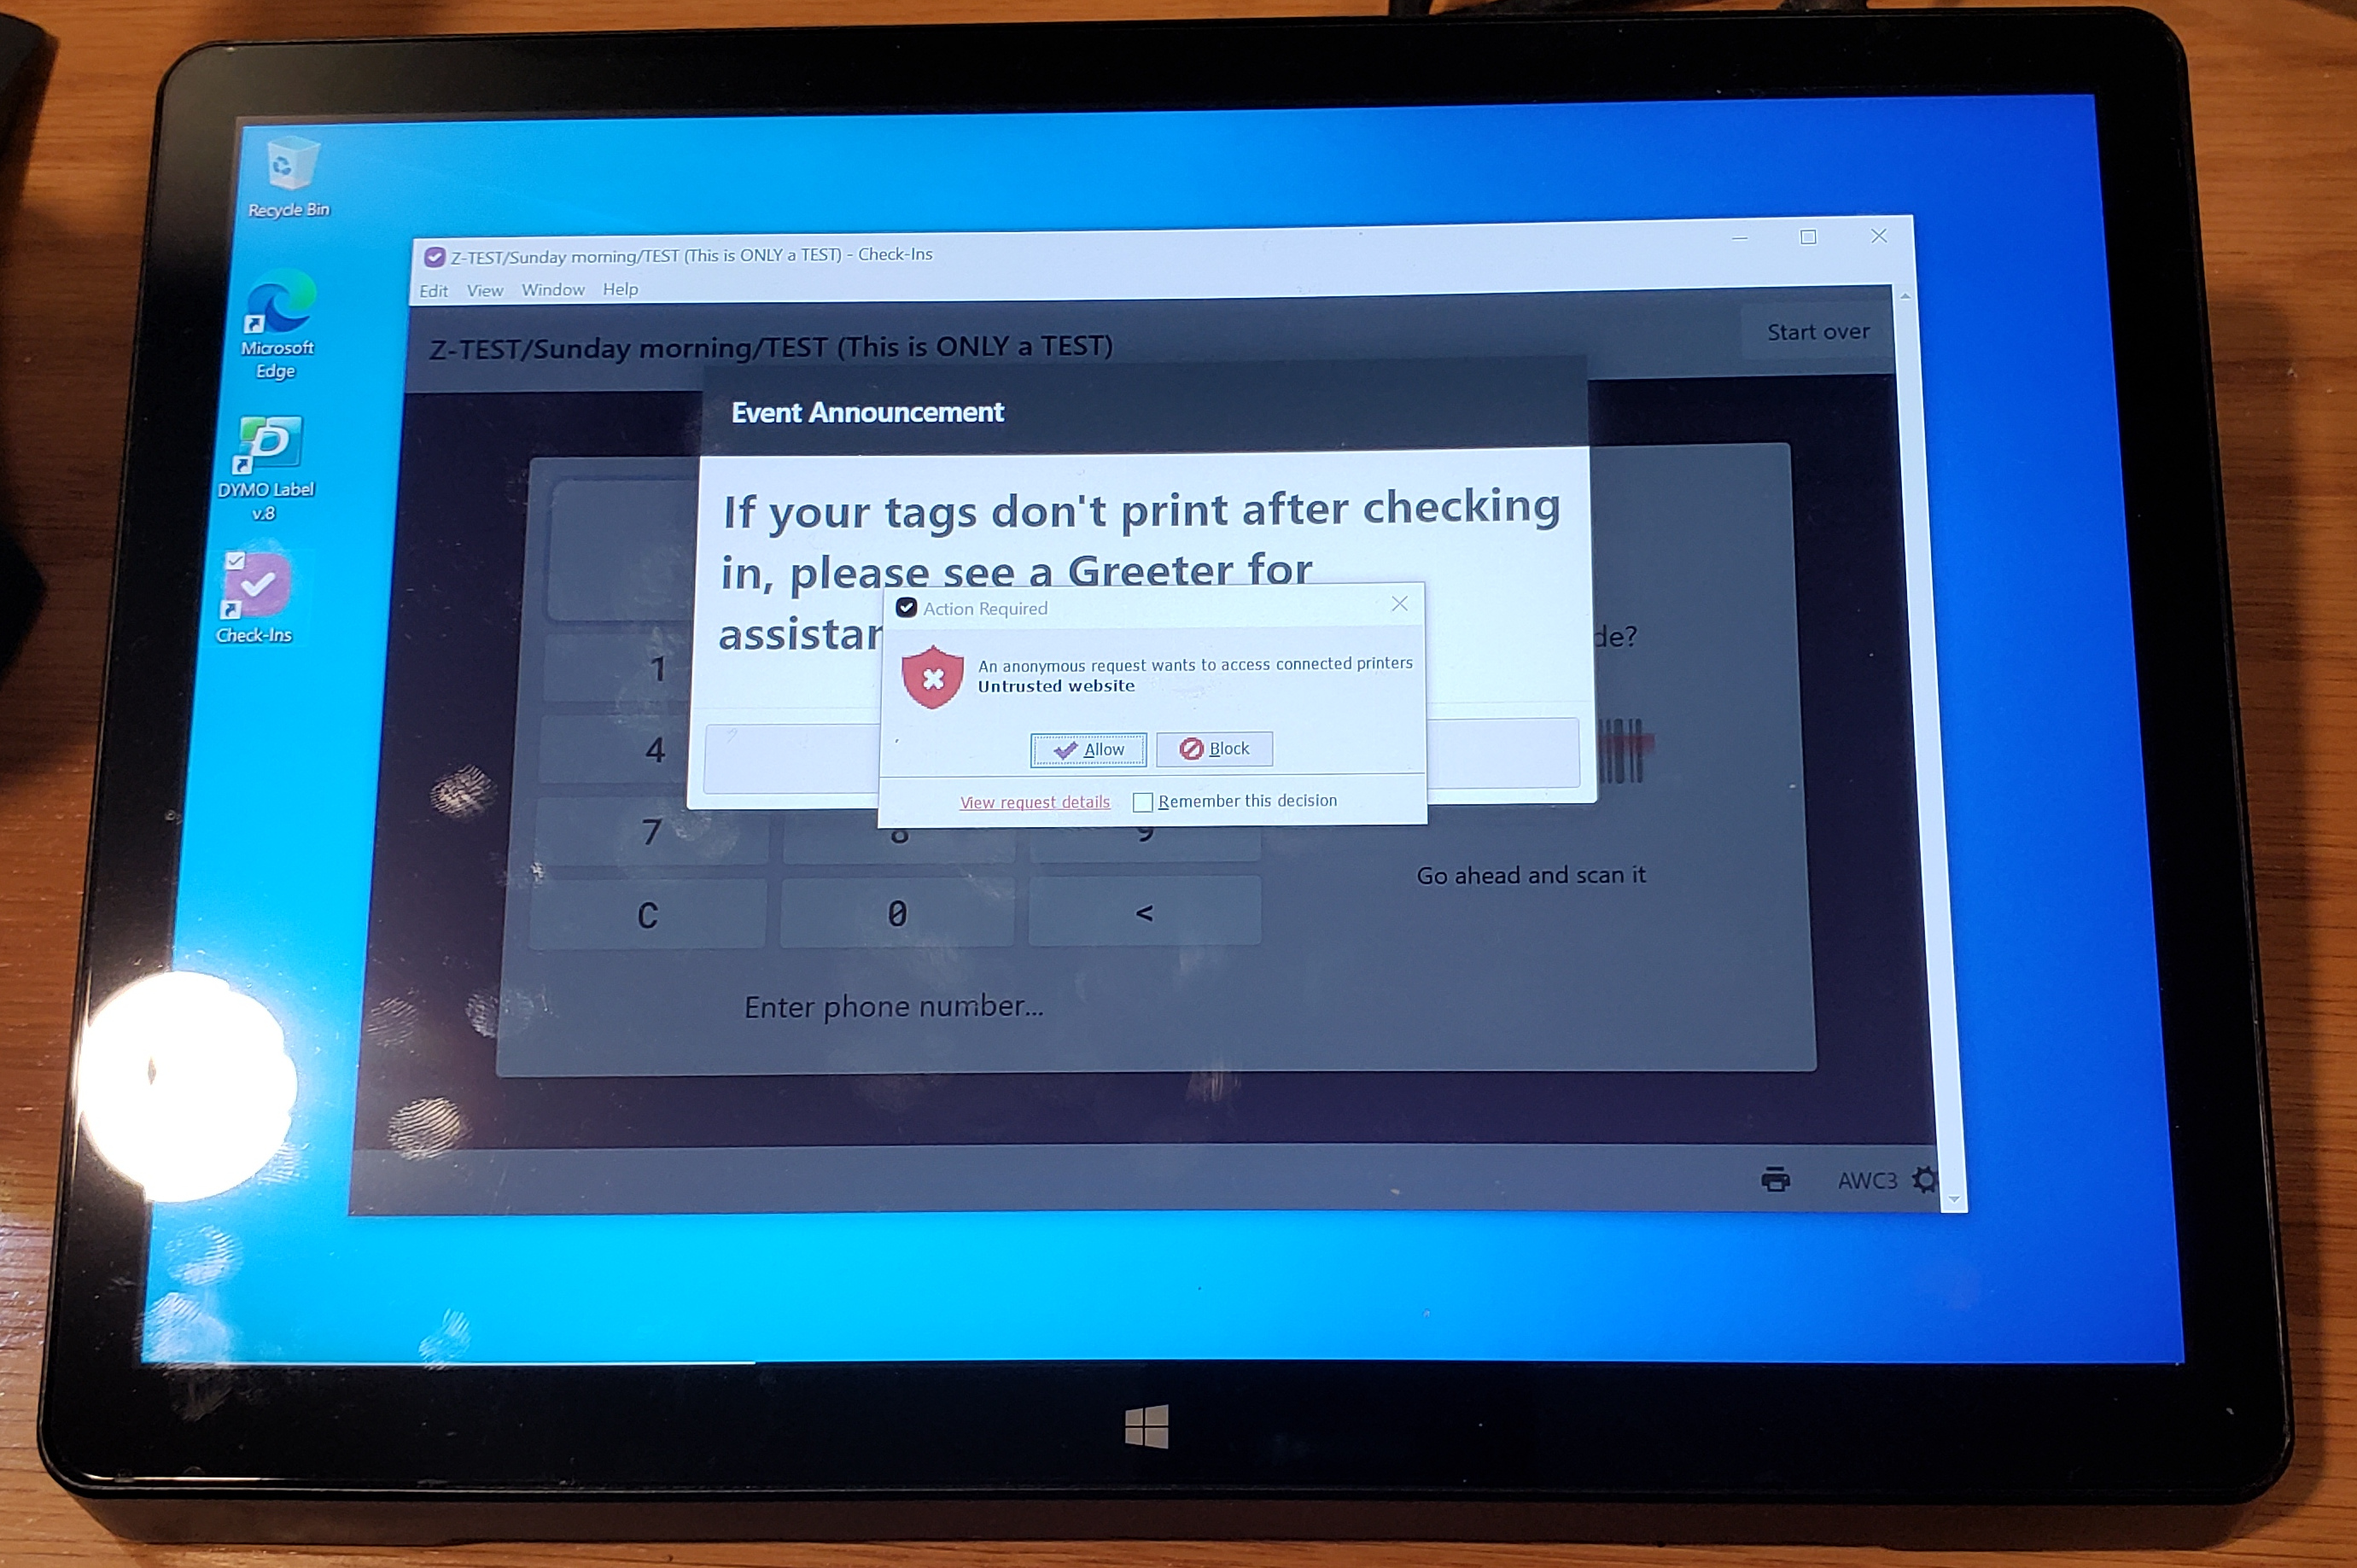 | Once in awhile you will see this error message. Simply click the 'Allow' button to move on. |
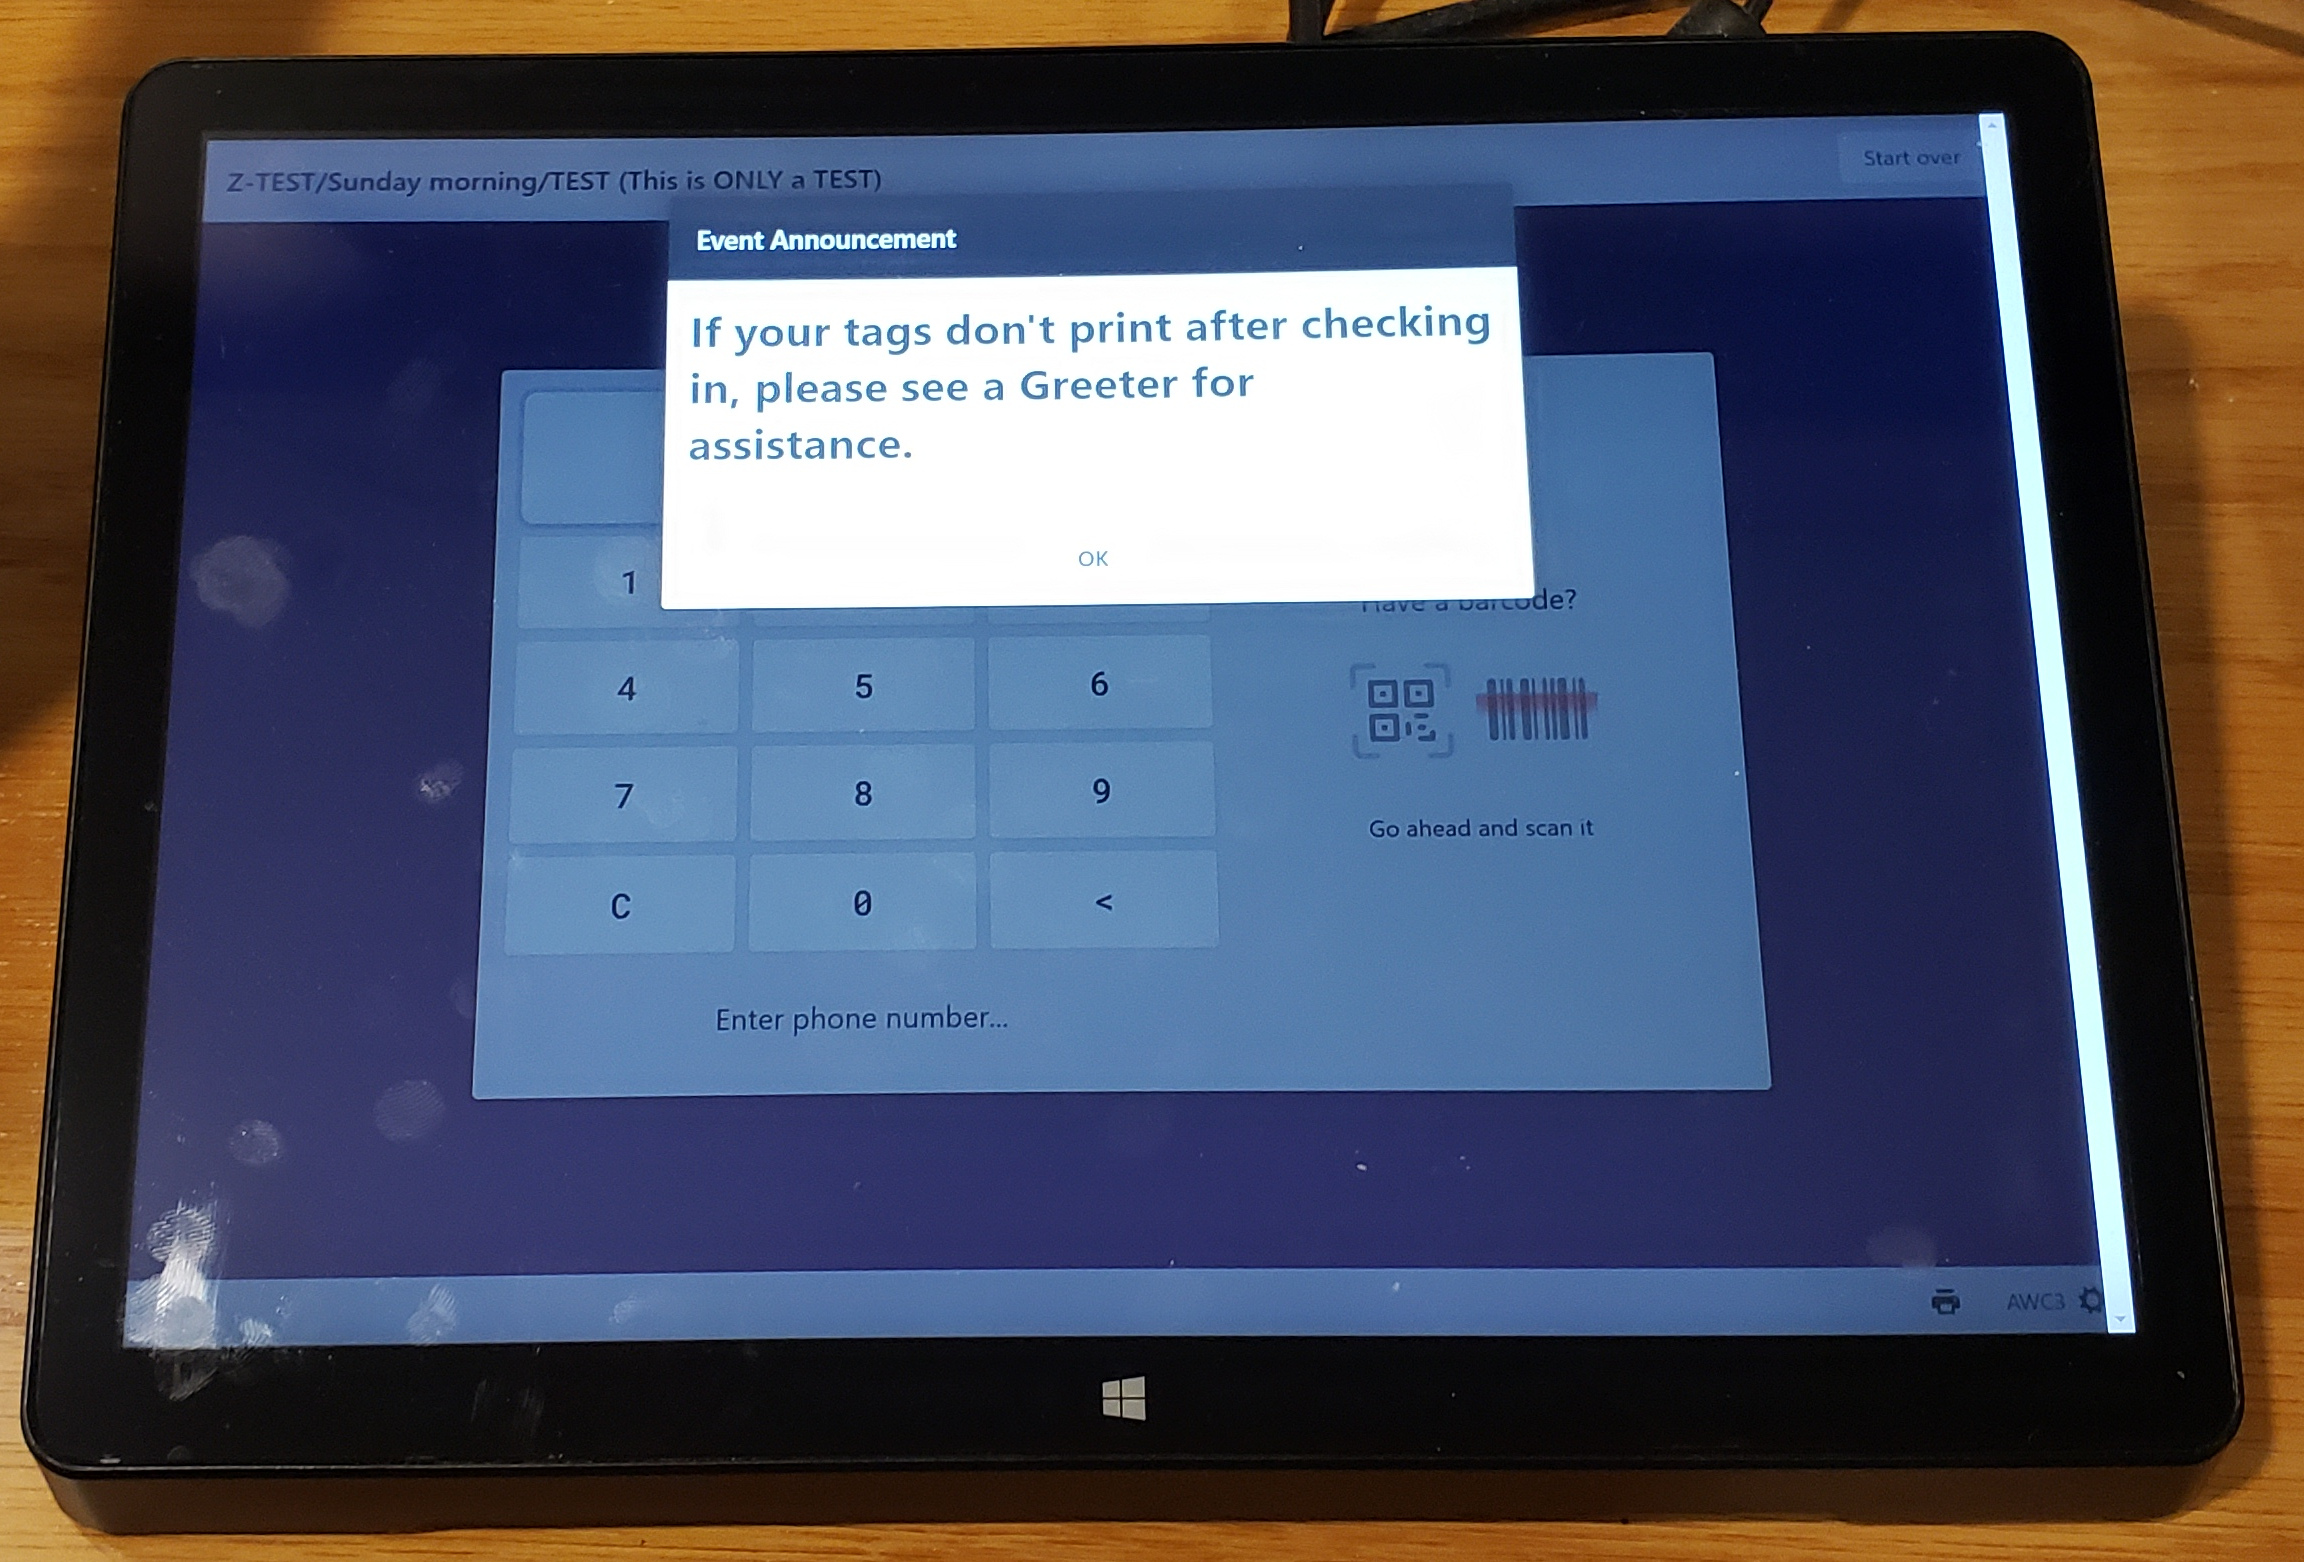
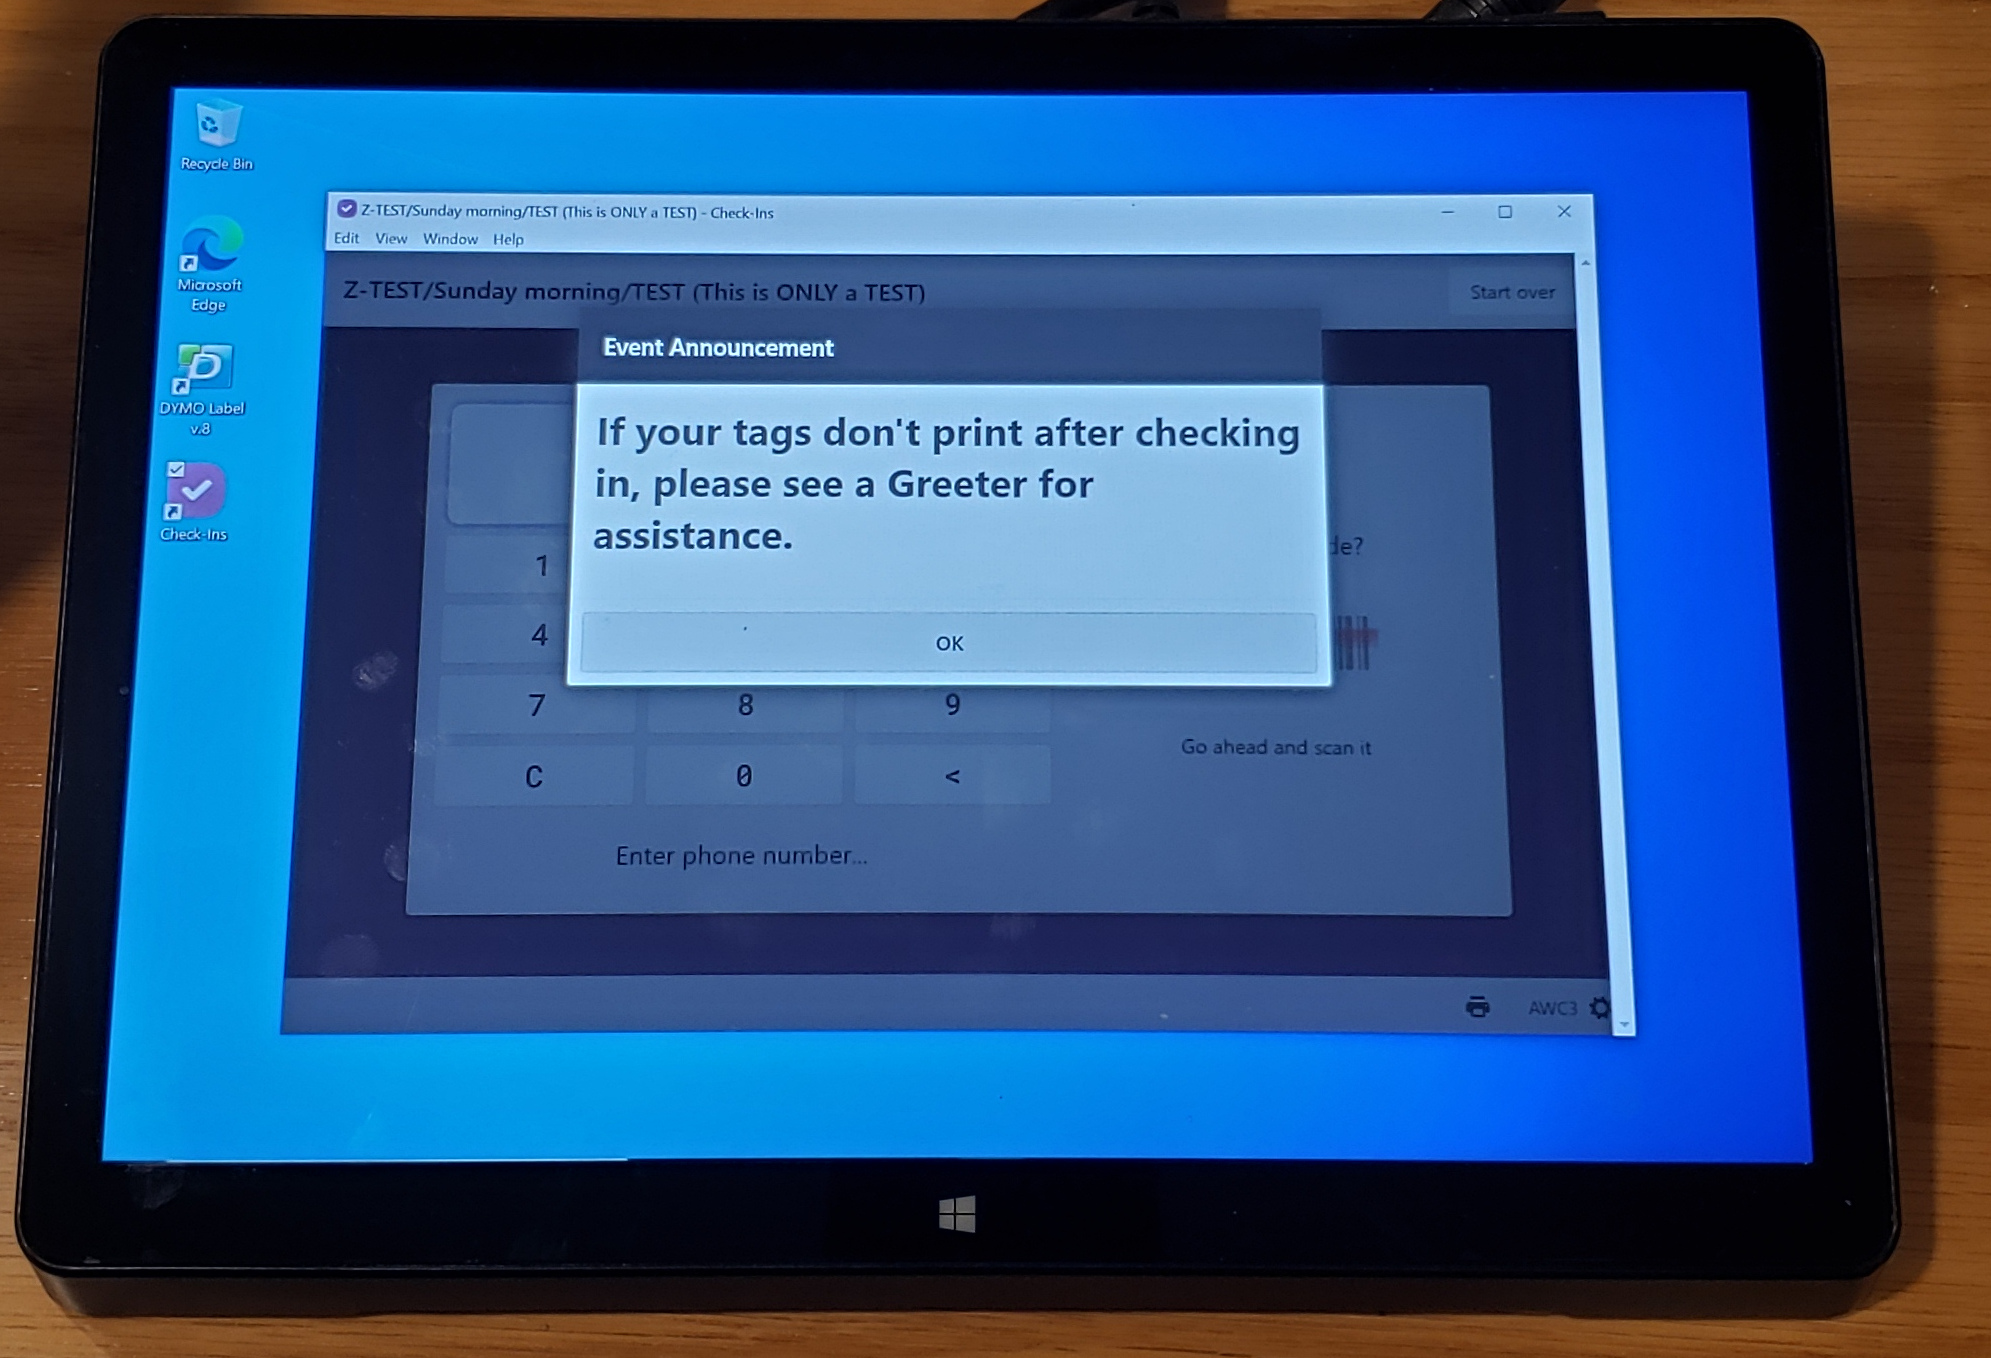 | Often the Check-Ins program will launch in a window rather than full screen. Click on the box icon at the top right of the window to make it change to full screen. Notice that there should be a pop-up box that tells people to contact a greeter if their badge does not printout properly. The printer might be out of labels, or there may be a print queue problem. To get started checking in, the person will need to click the 'Ok' button. When they do, this pop-up will close reveling the check-in screen. |
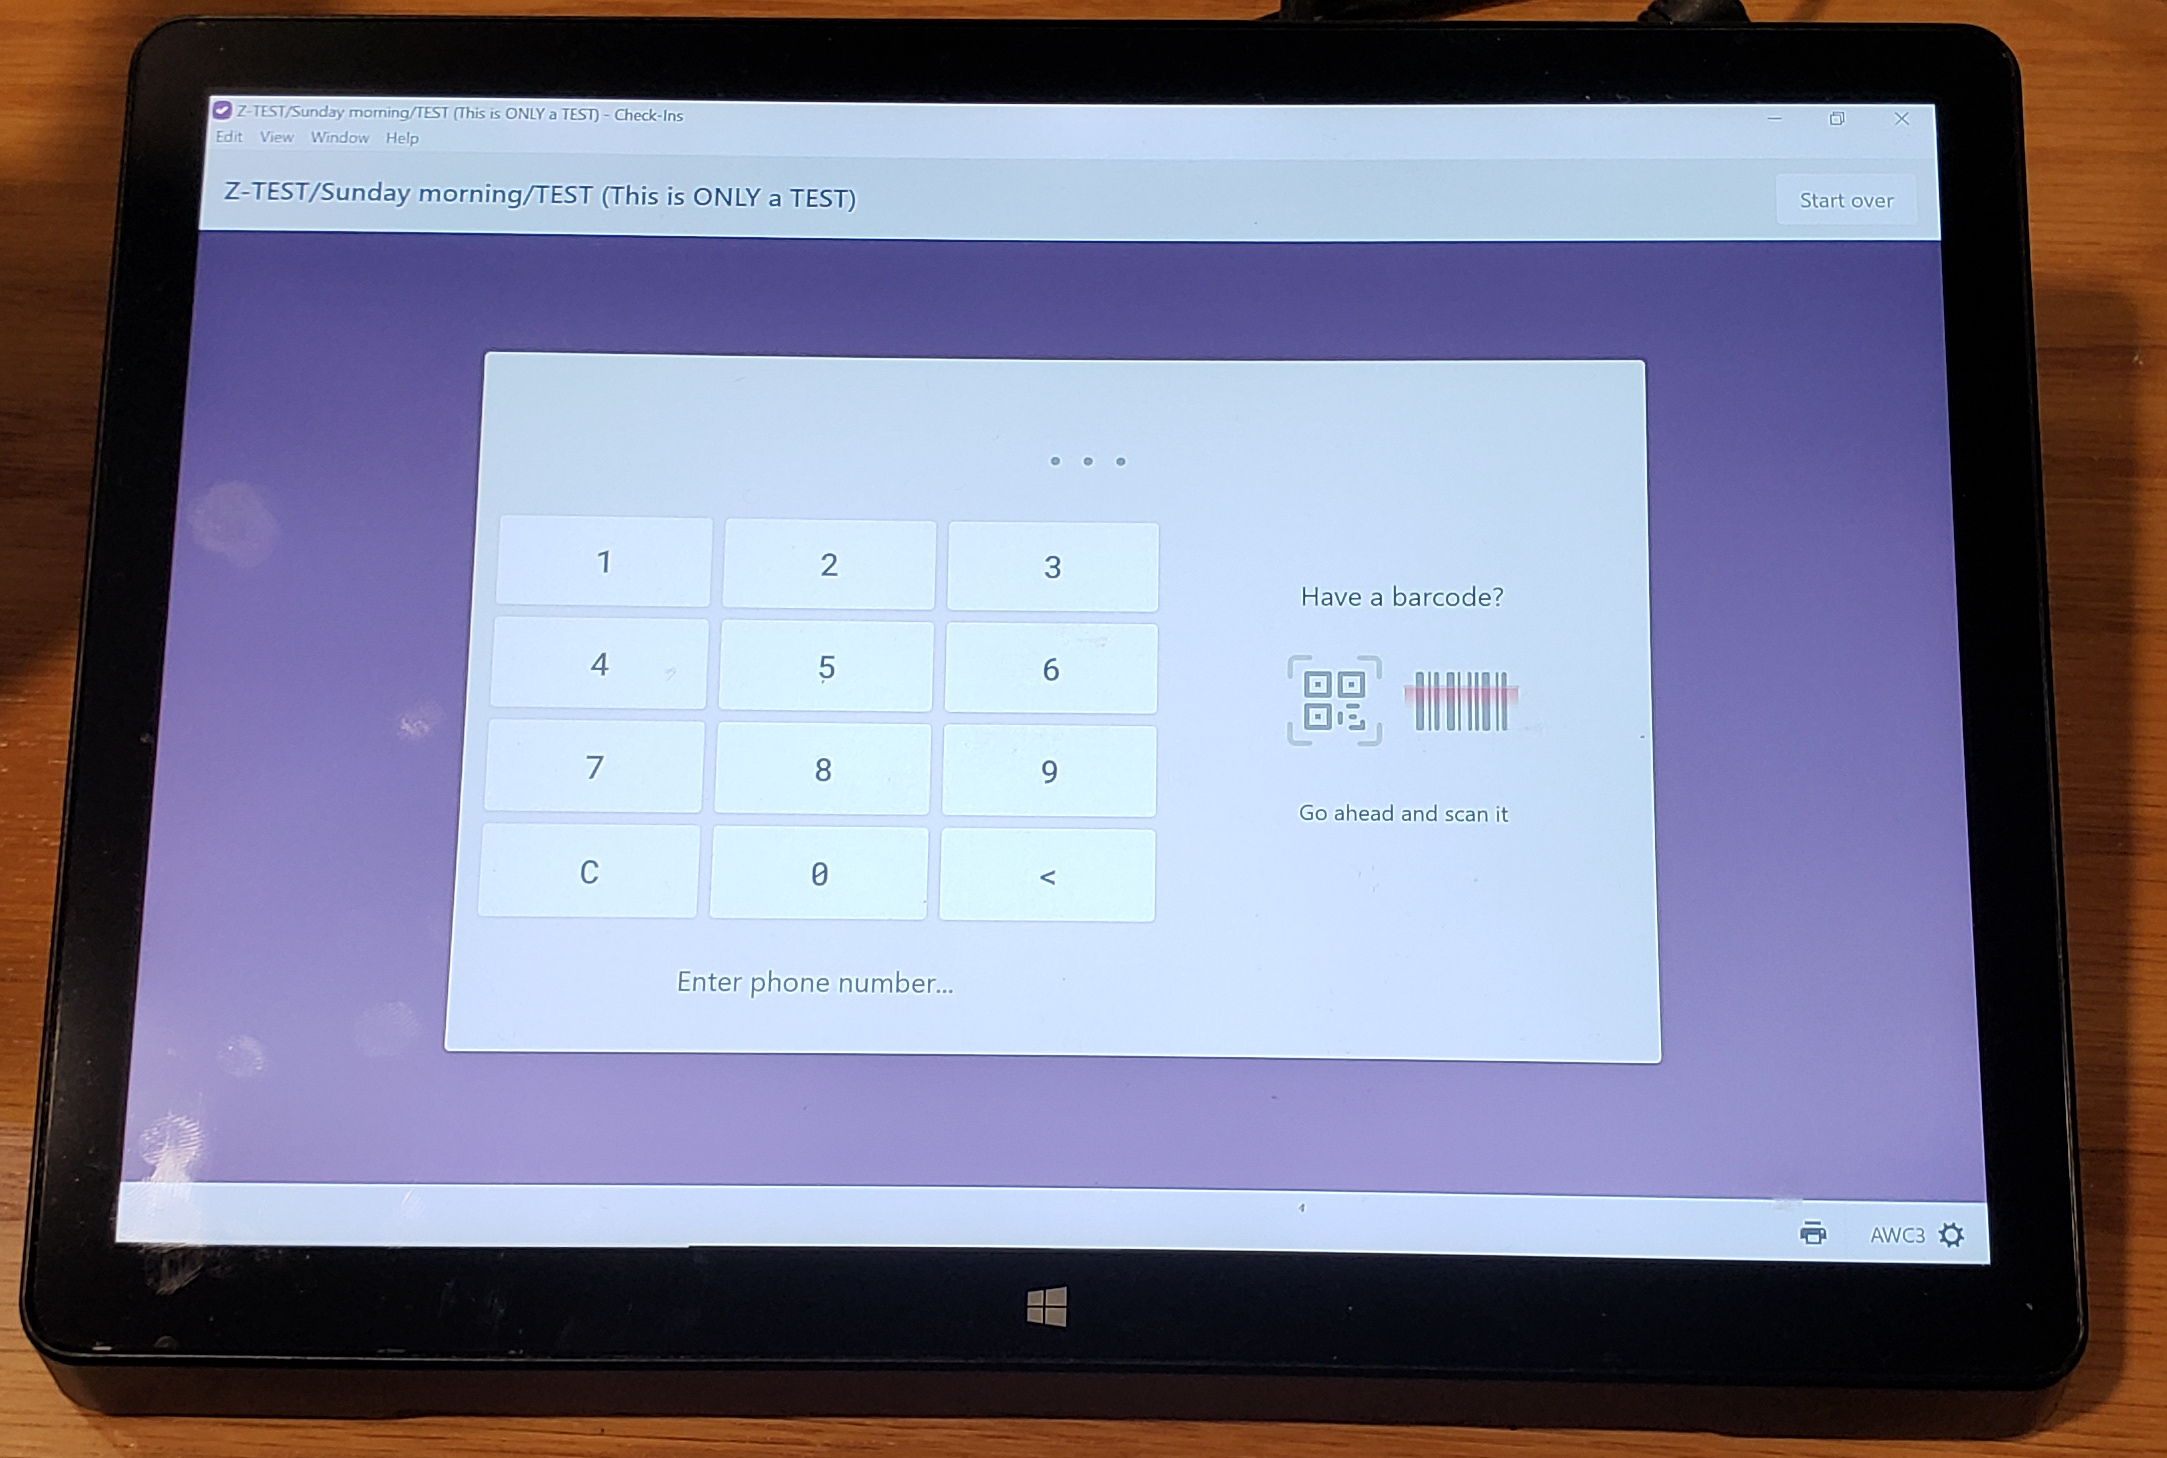 | This is the identification screen. A person can use the scanner to scan their QR code rather than enter their phone number, or they can enter their phone number (usually not requiring the area code). |
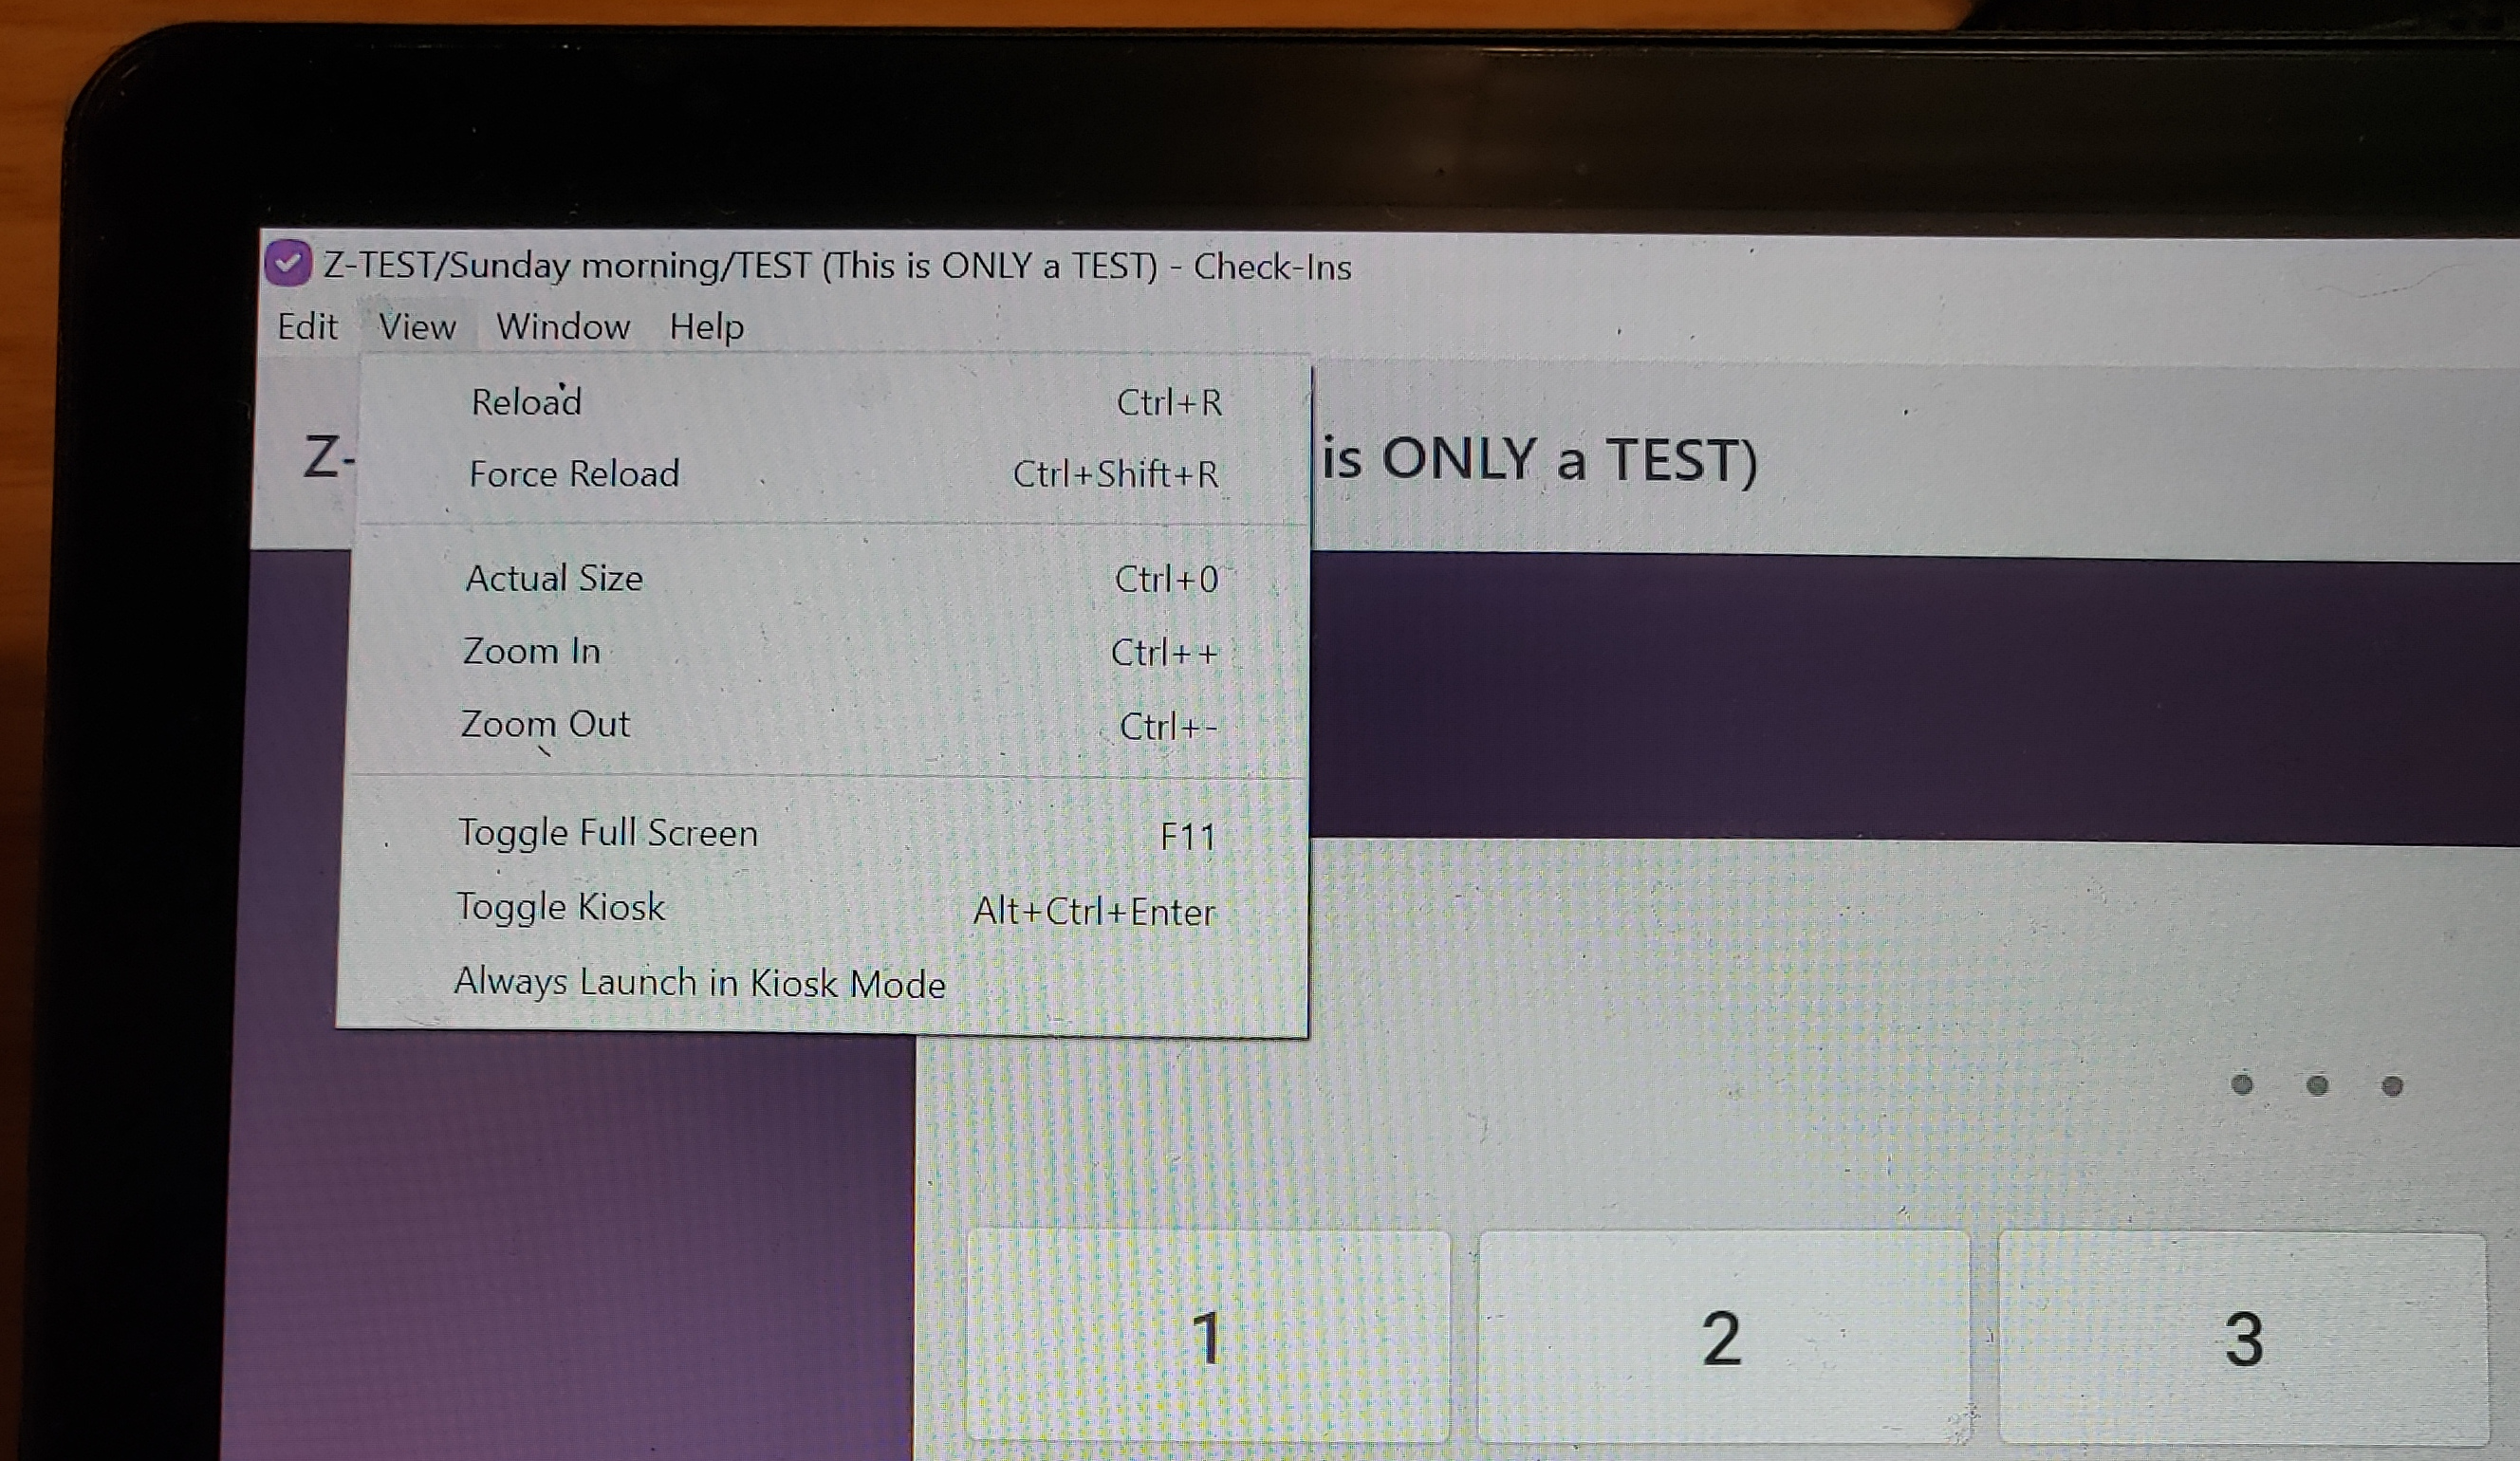 | Notice that across the top there is still a command bar. You can click on 'View' followed by 'Toggle Kiosk' to remove this bar. |
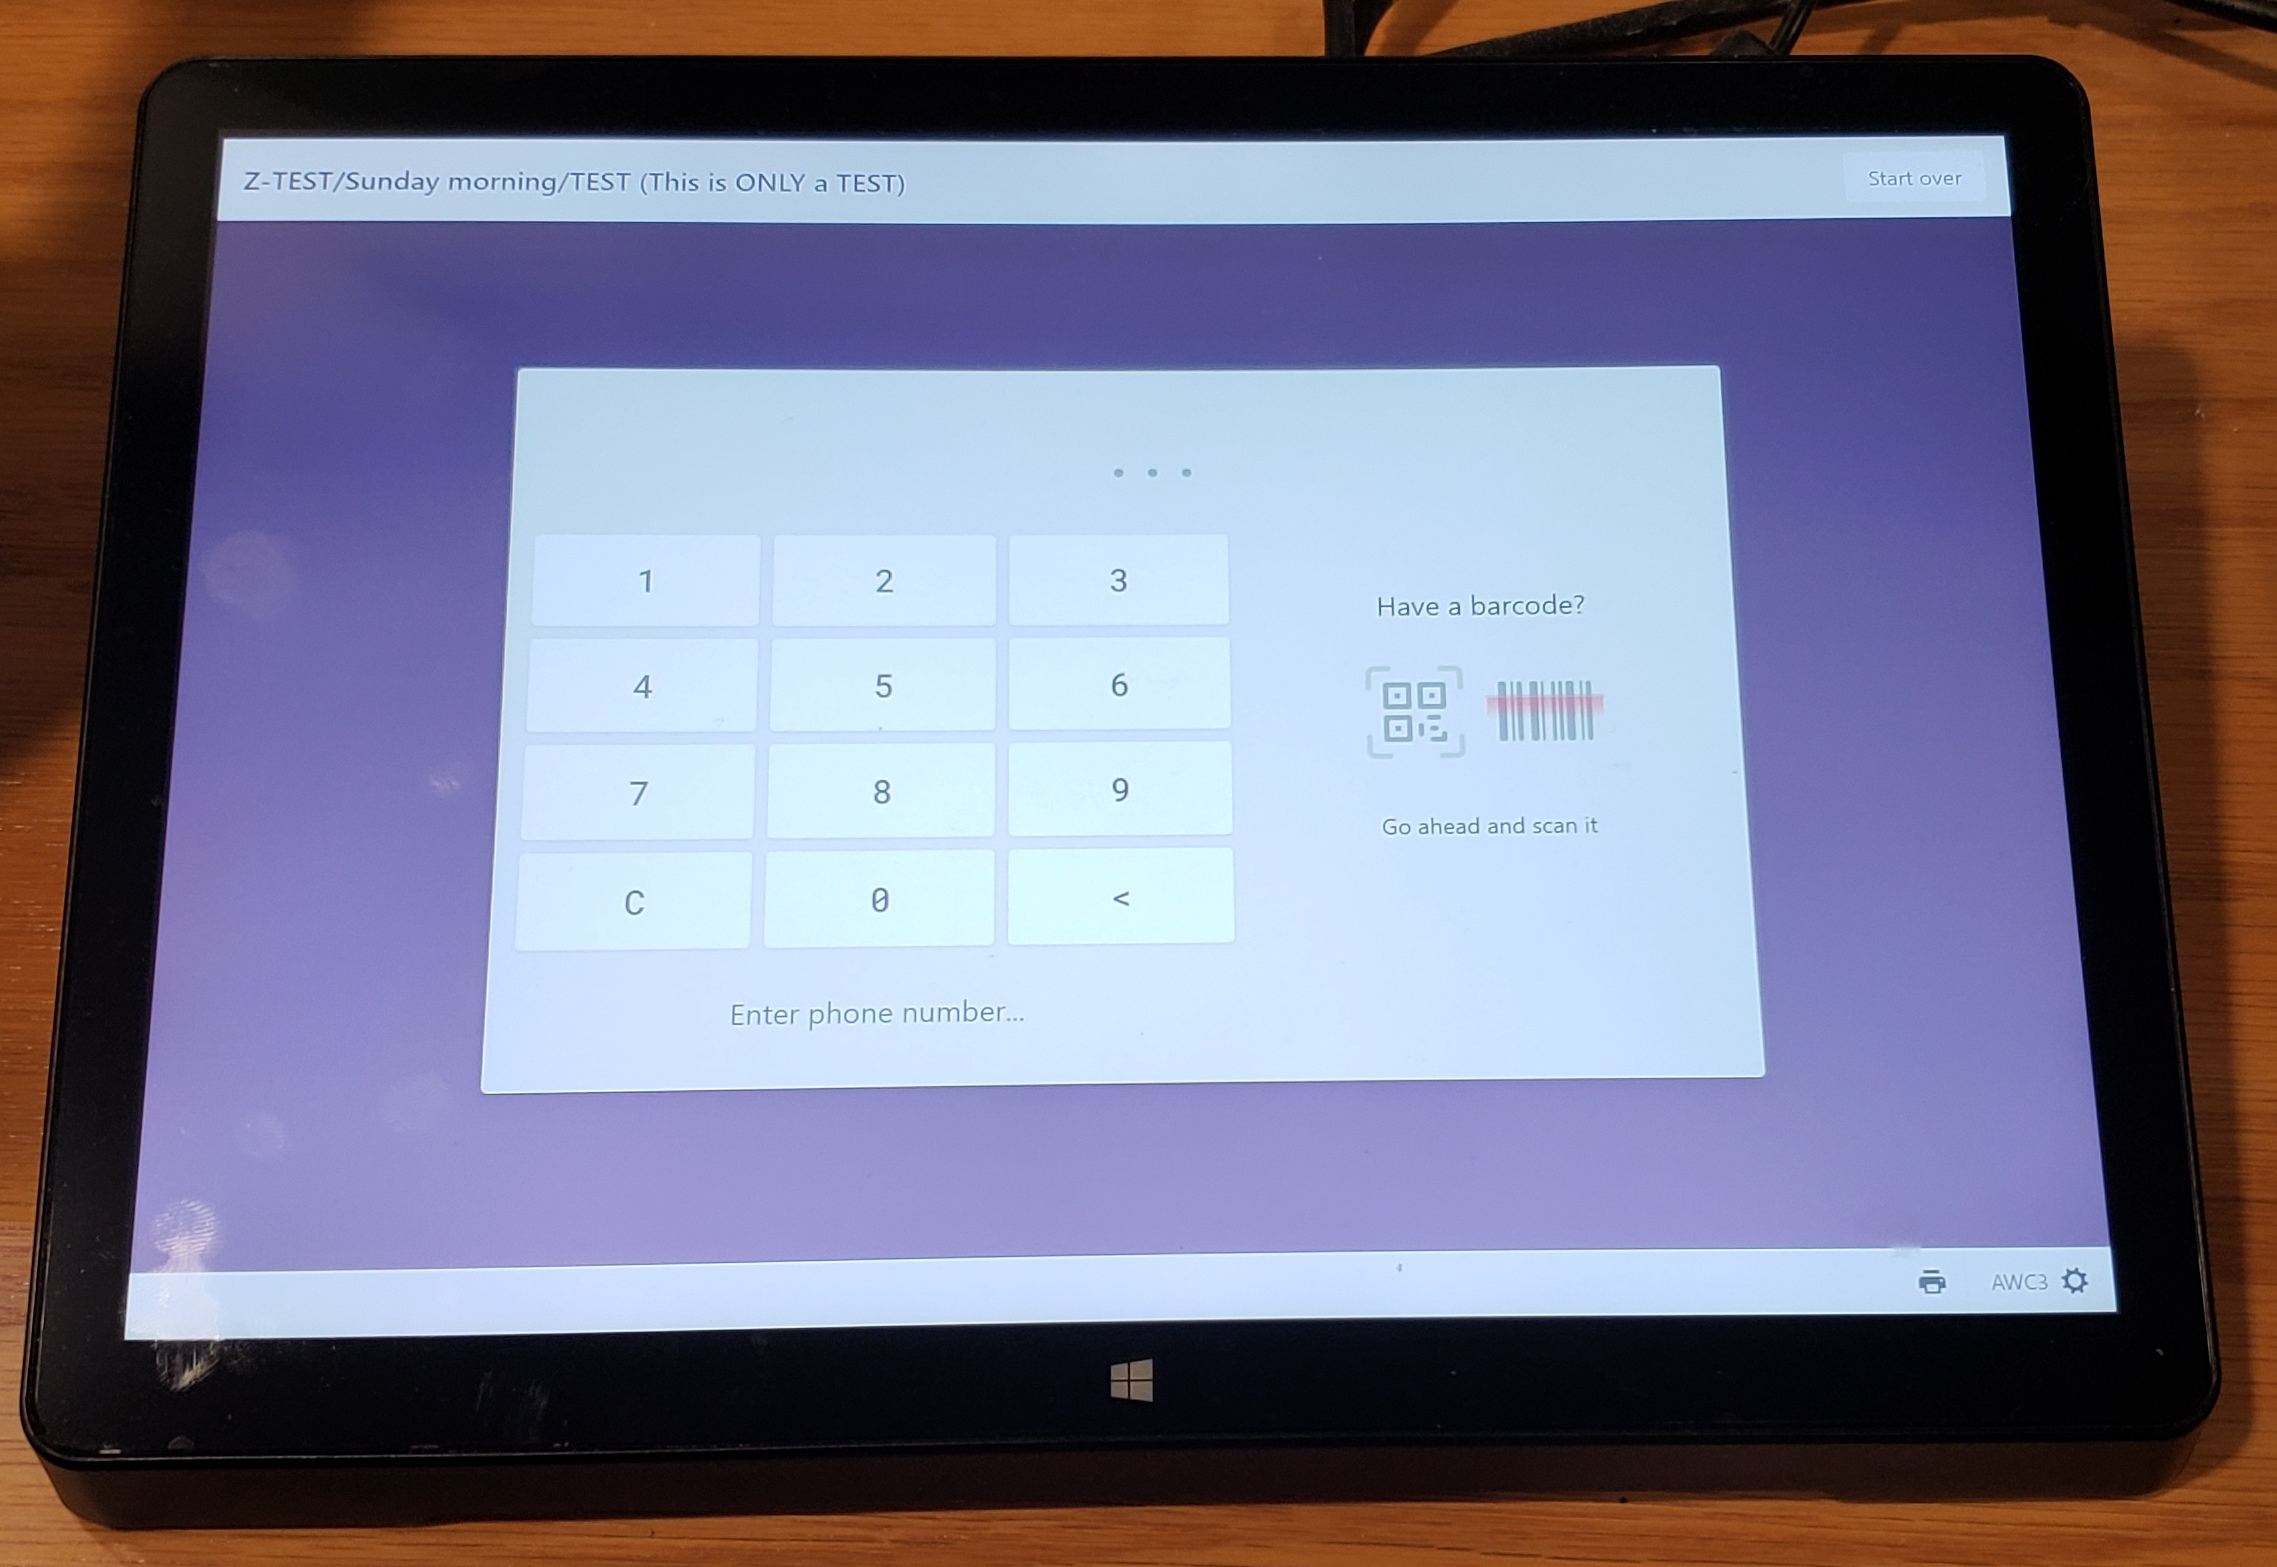 | Here the command bar is no longer displayed across the top of the window. |
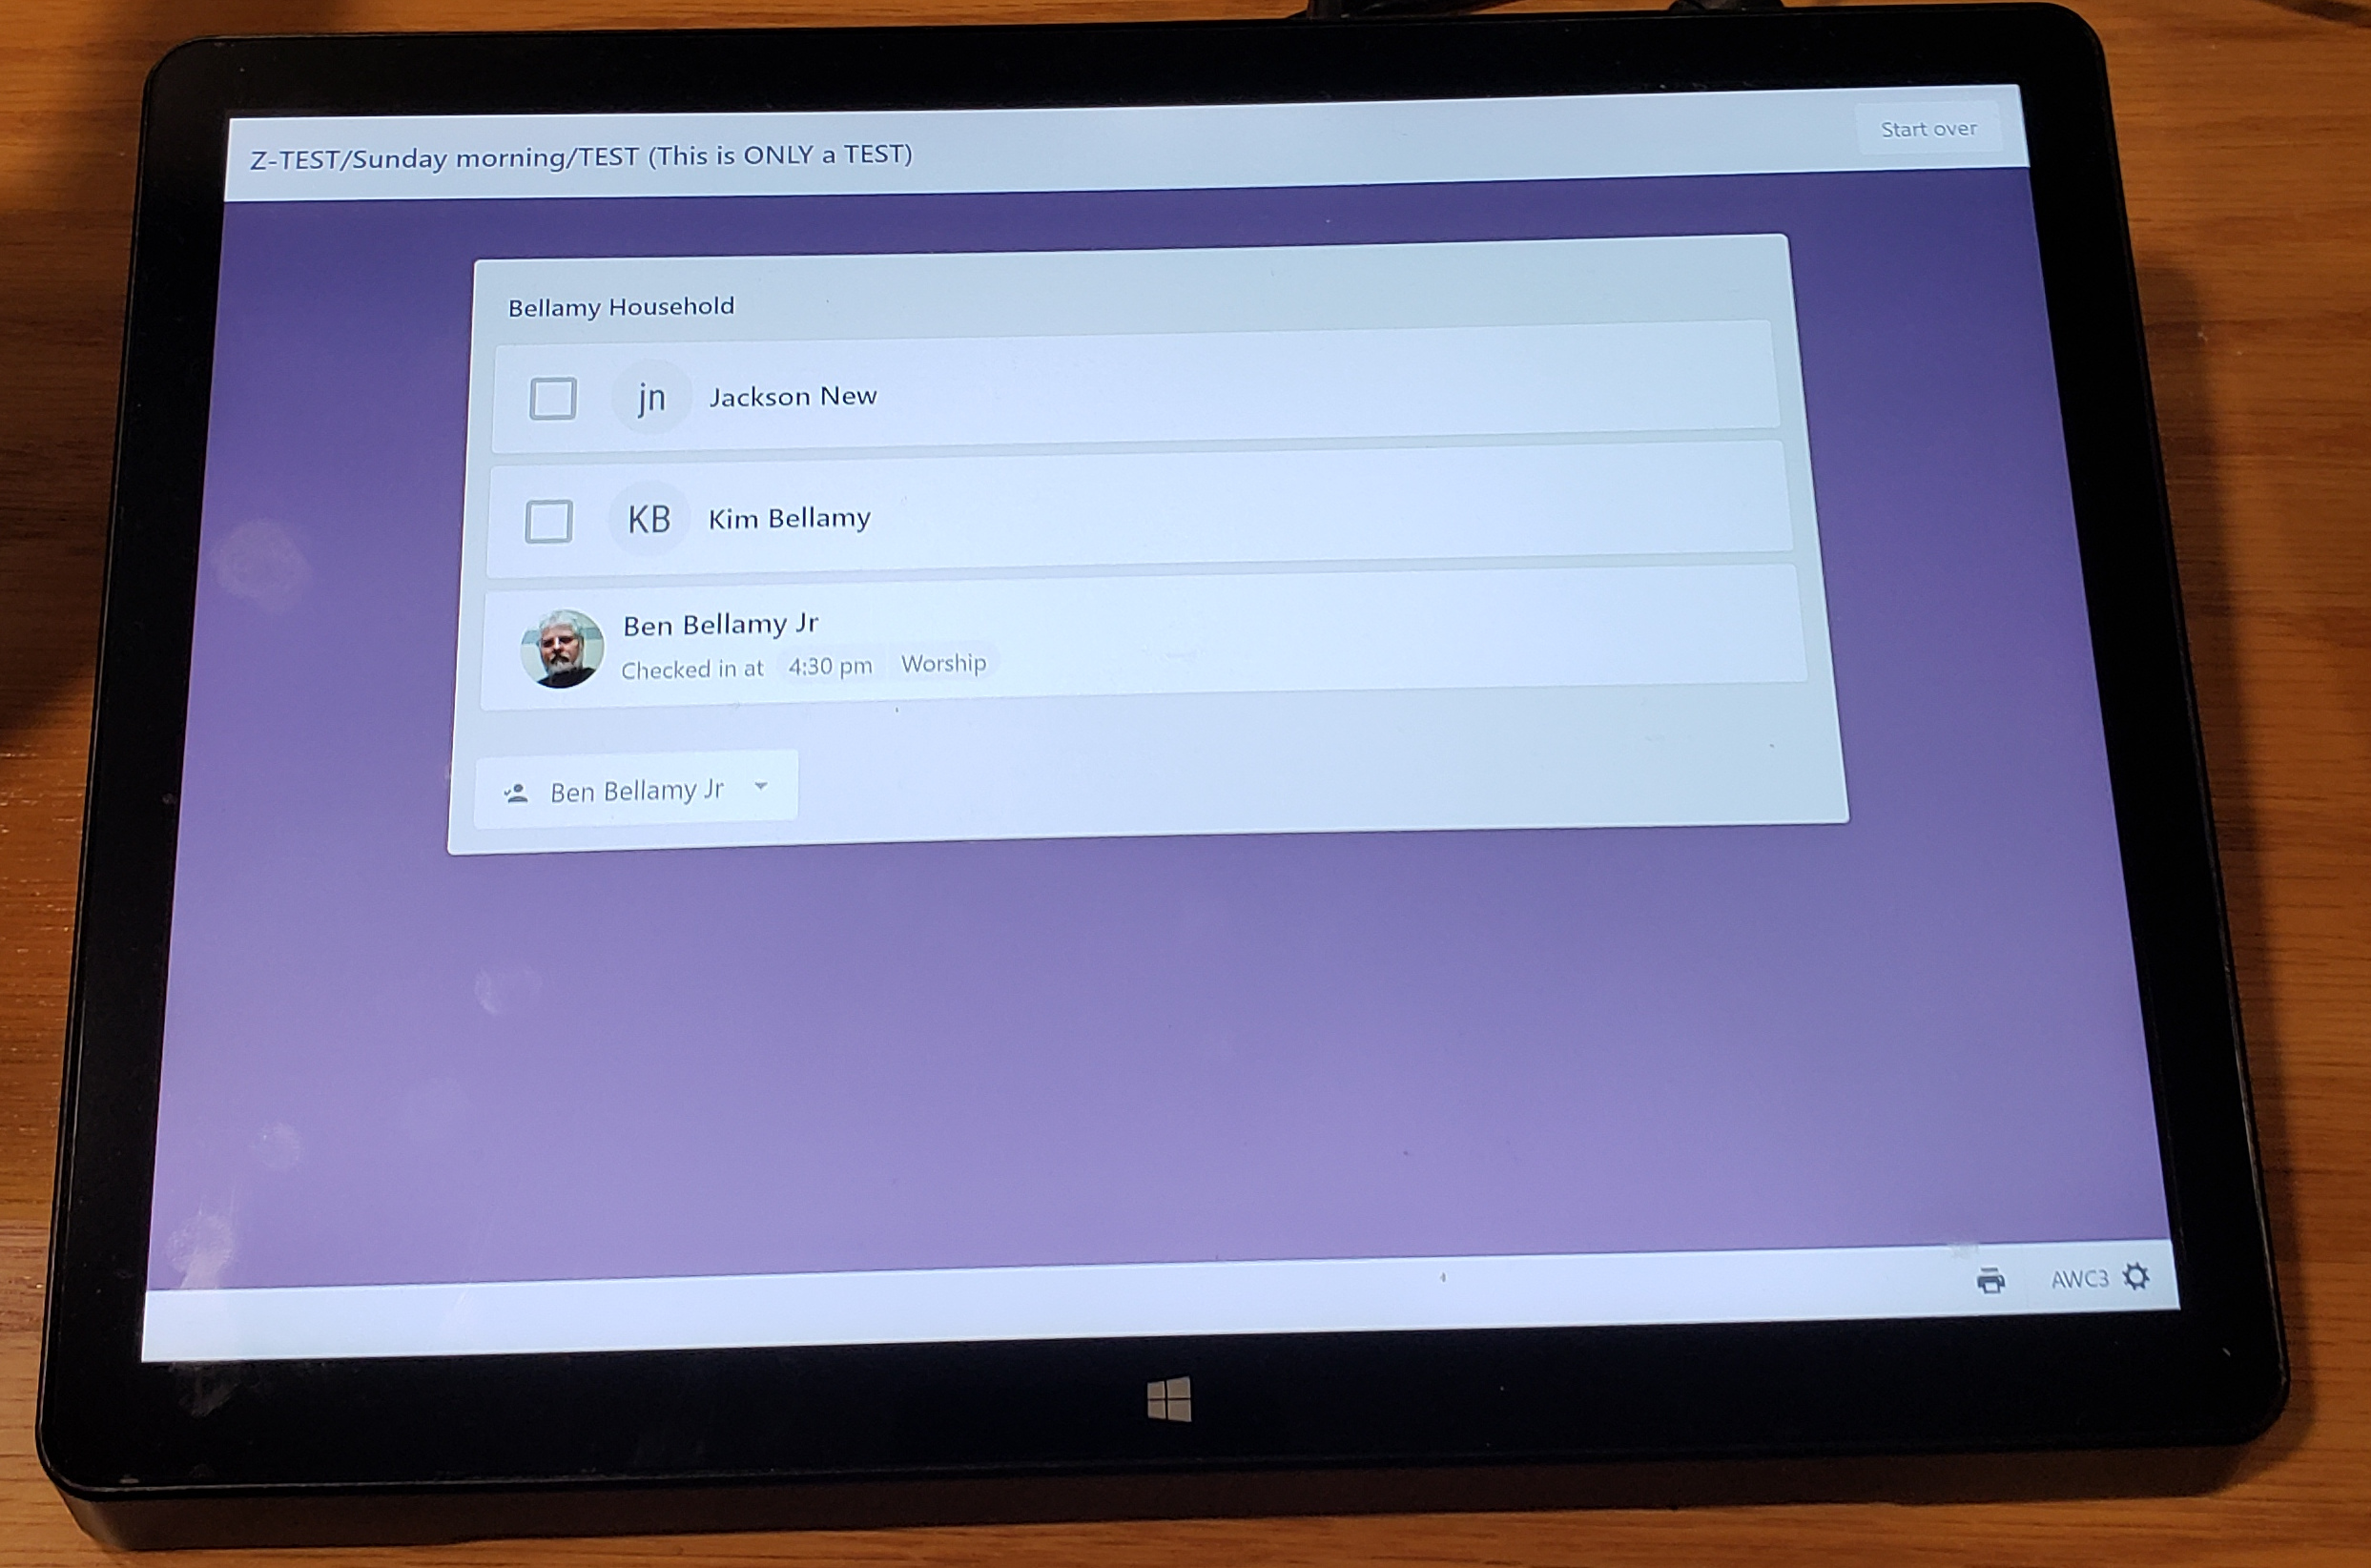 | Once you have entered the phone number, all of the members of that family group will be listed. You can check the boxes of those you want to check-in, or click on just one to check that one person in. |
 | Once that person or persons have been checked-in, you can click on one of the lines which will display a button to reprint another label for them. |
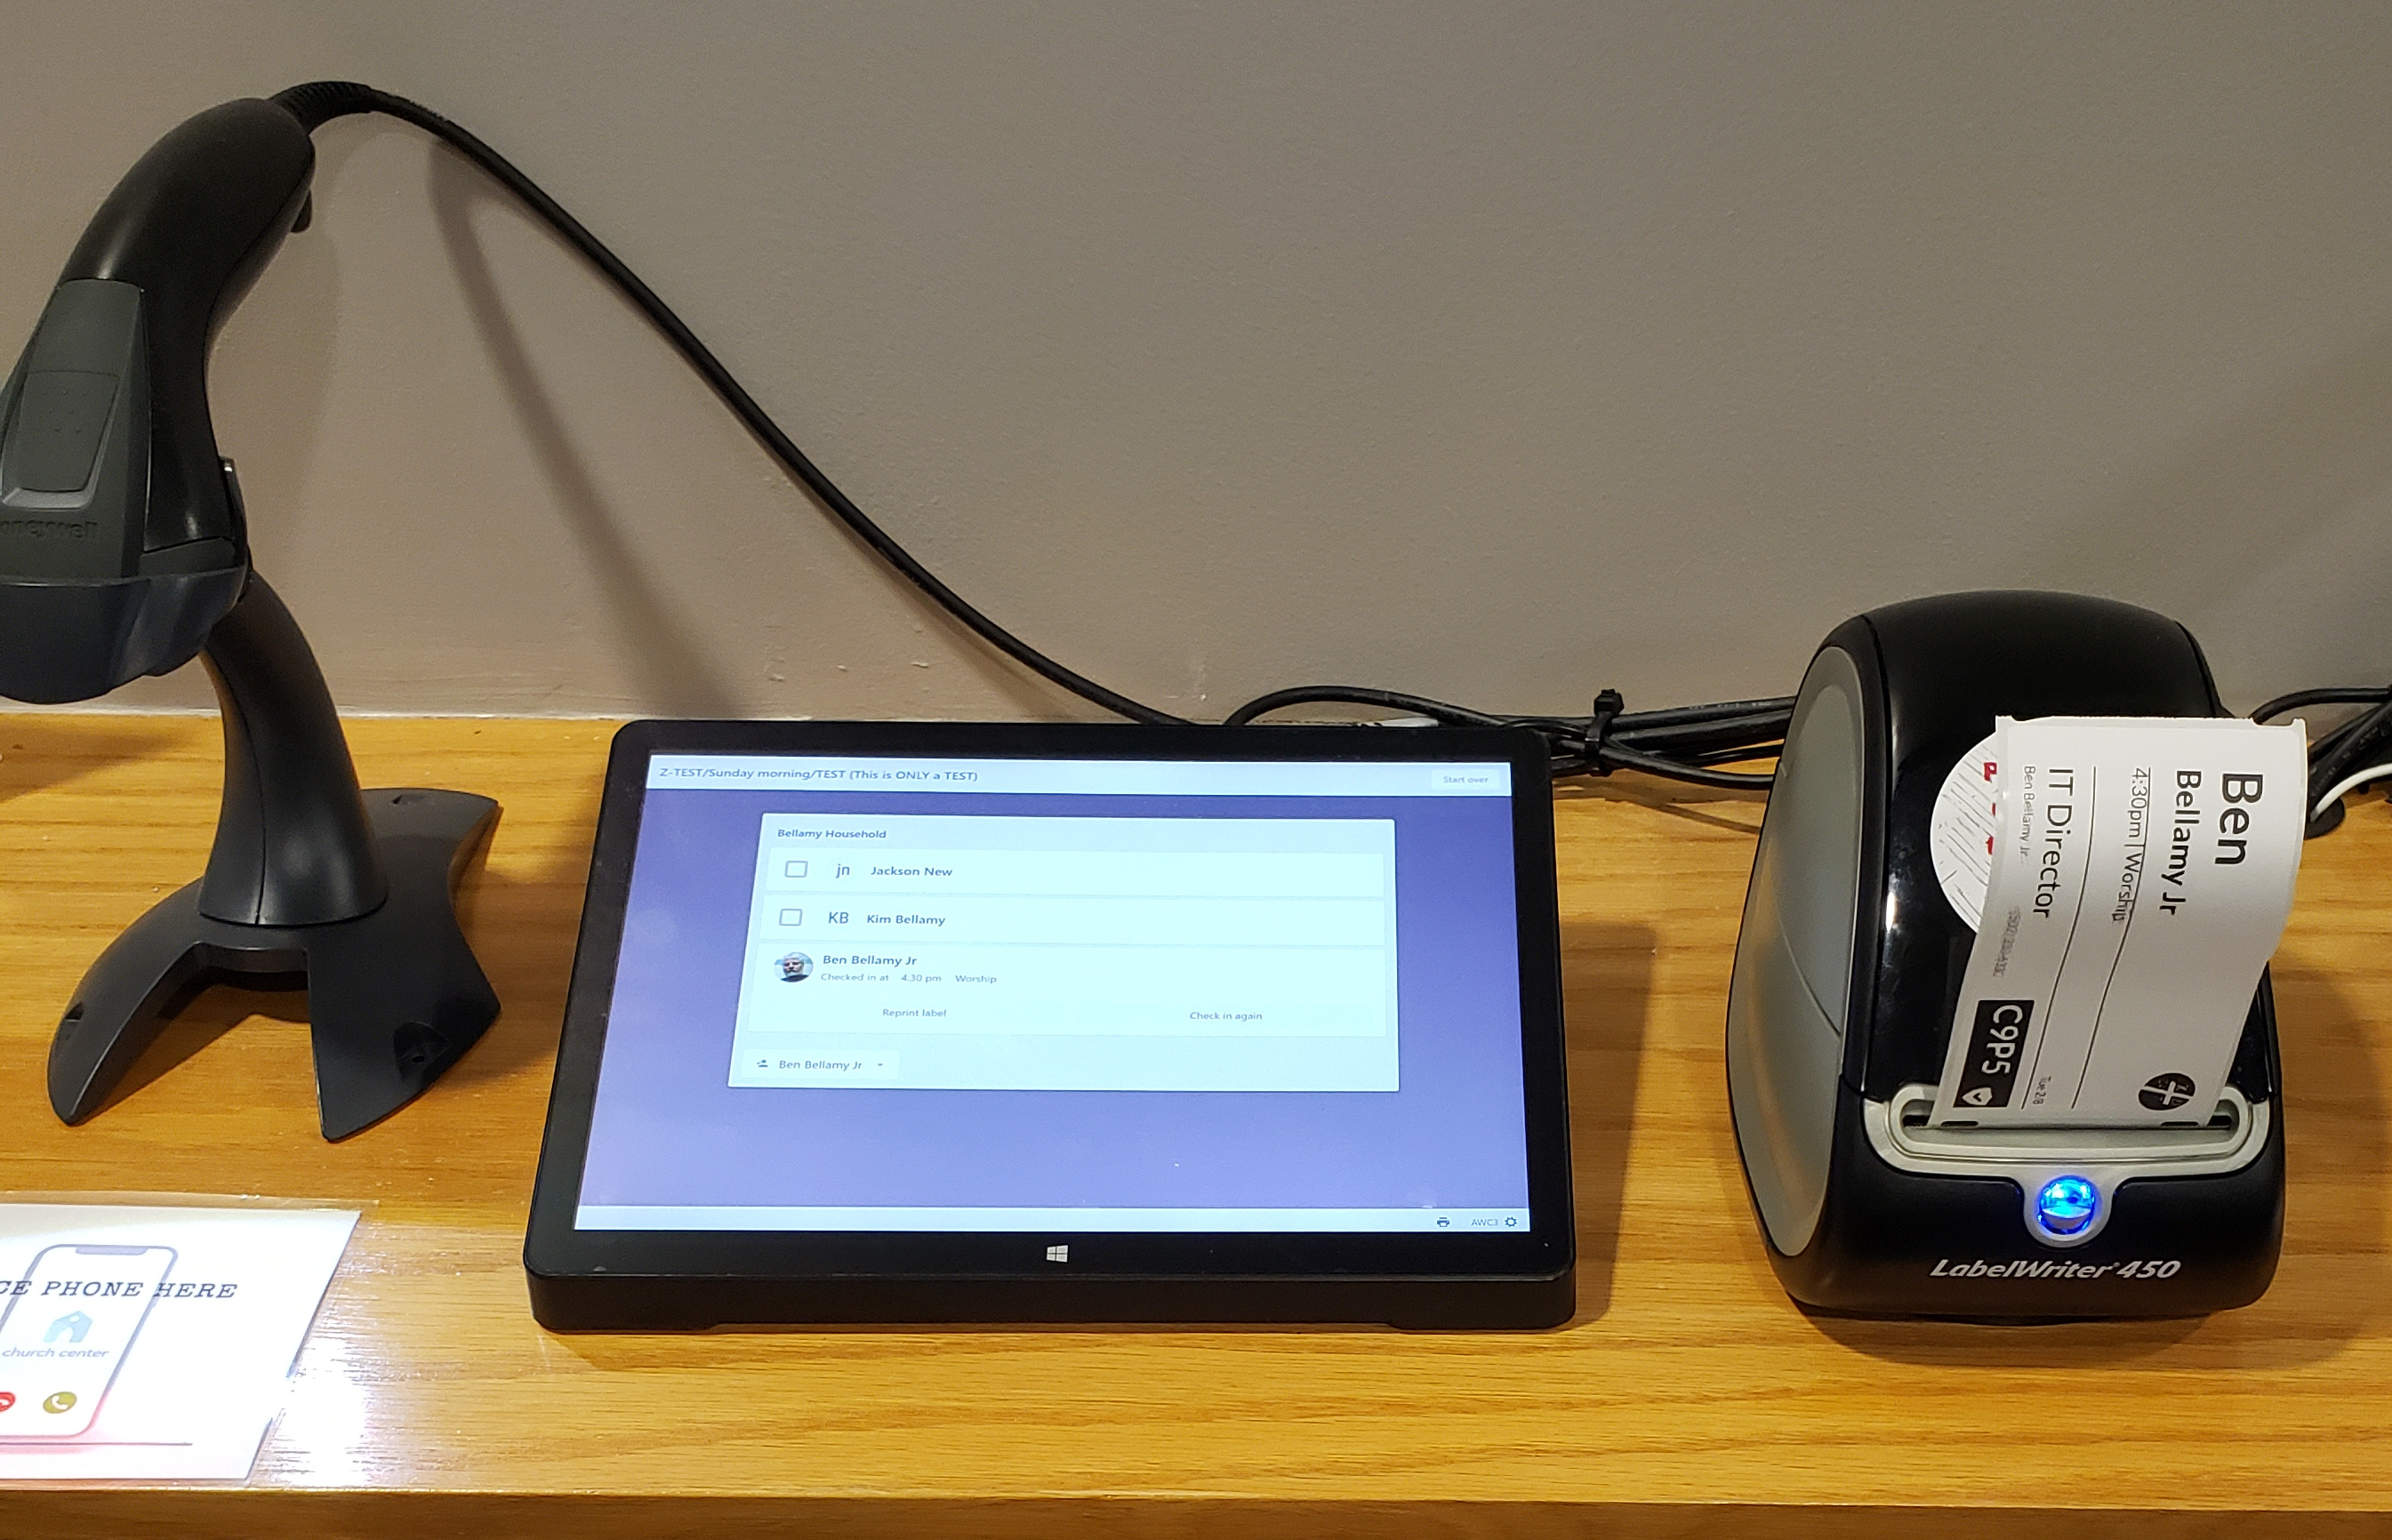 | Here you see that a label has printed. Be sure to tear the label off pulling from the top-right towards the bottom left. |
 | In any case, after several seconds, this screen will change back to the pop-up message telling them to contact a greeter if their label did not print. |
 | In this window you can set this one kiosk to be a 'Self' device meaning that people can use it simply to check-in as was illustrated above. That makes the assumption that they are already in our system. You can also select which event they are checking into from the pull-down list of existing events. The other setting should be as shown. |
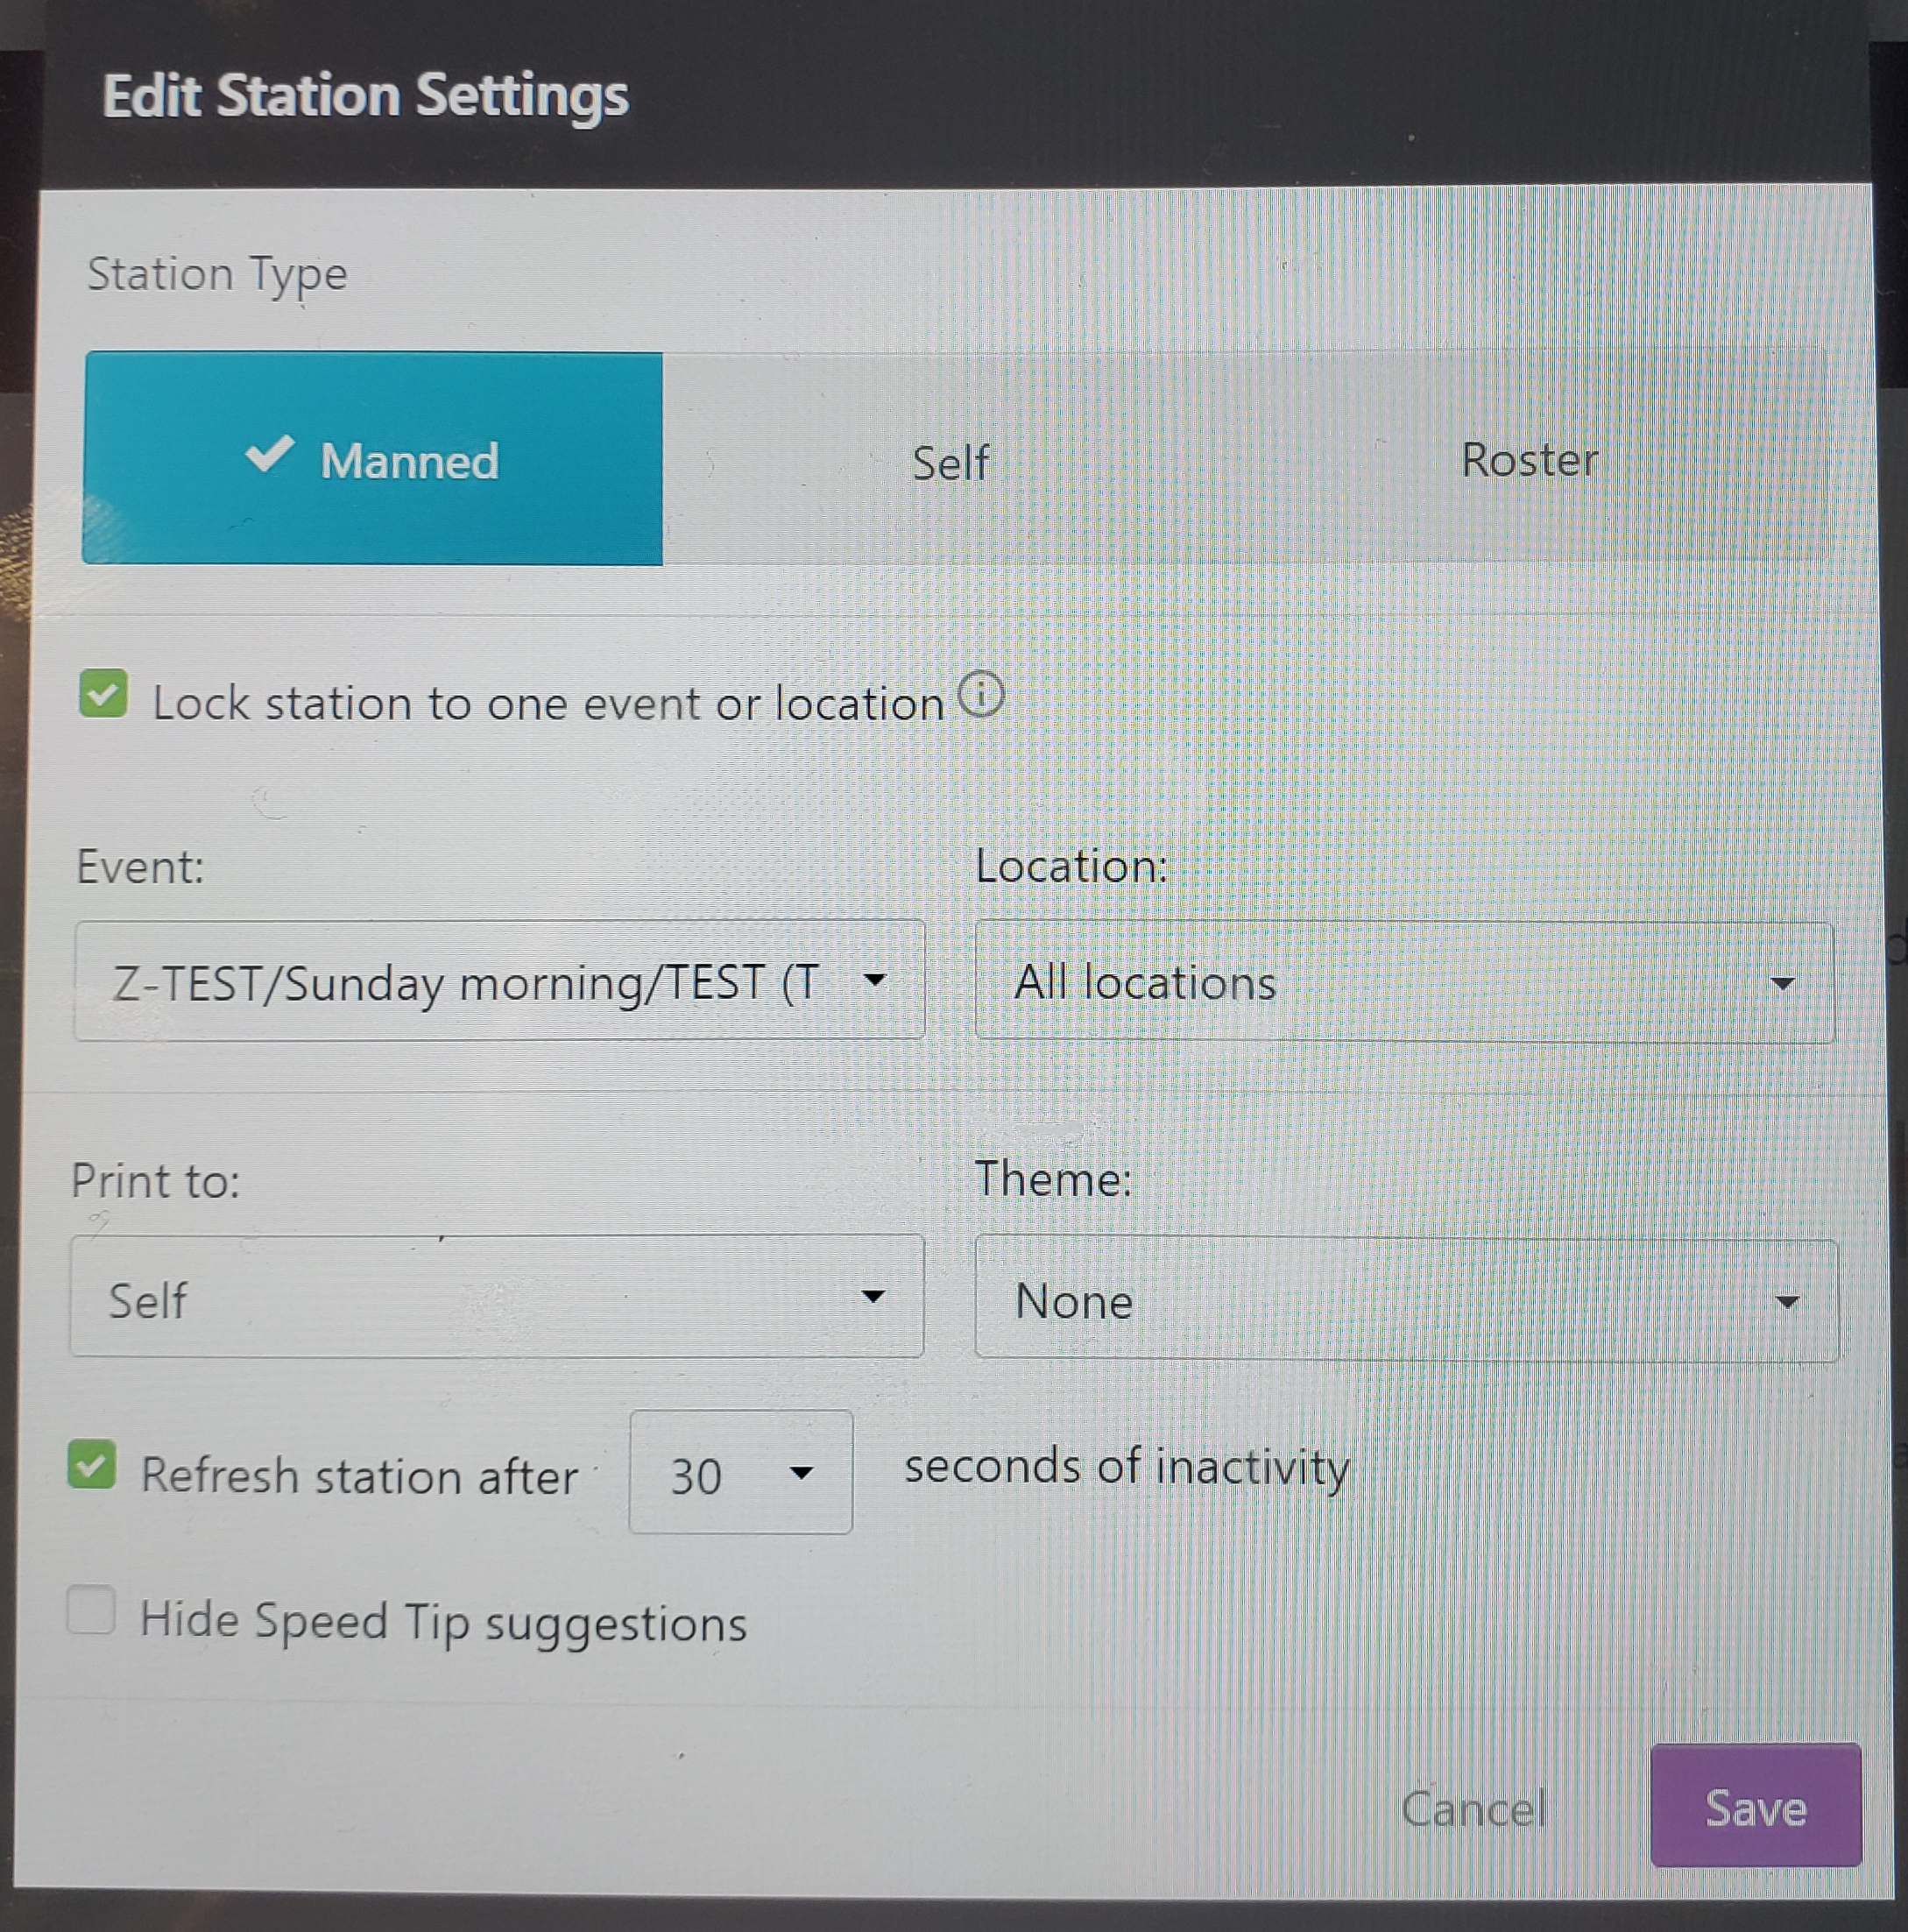 | You can also set this device to be 'Manned' meaning that a greeter would operated this station for the purpose of adding people into our system. Once added, they can simply check-in from then on. |
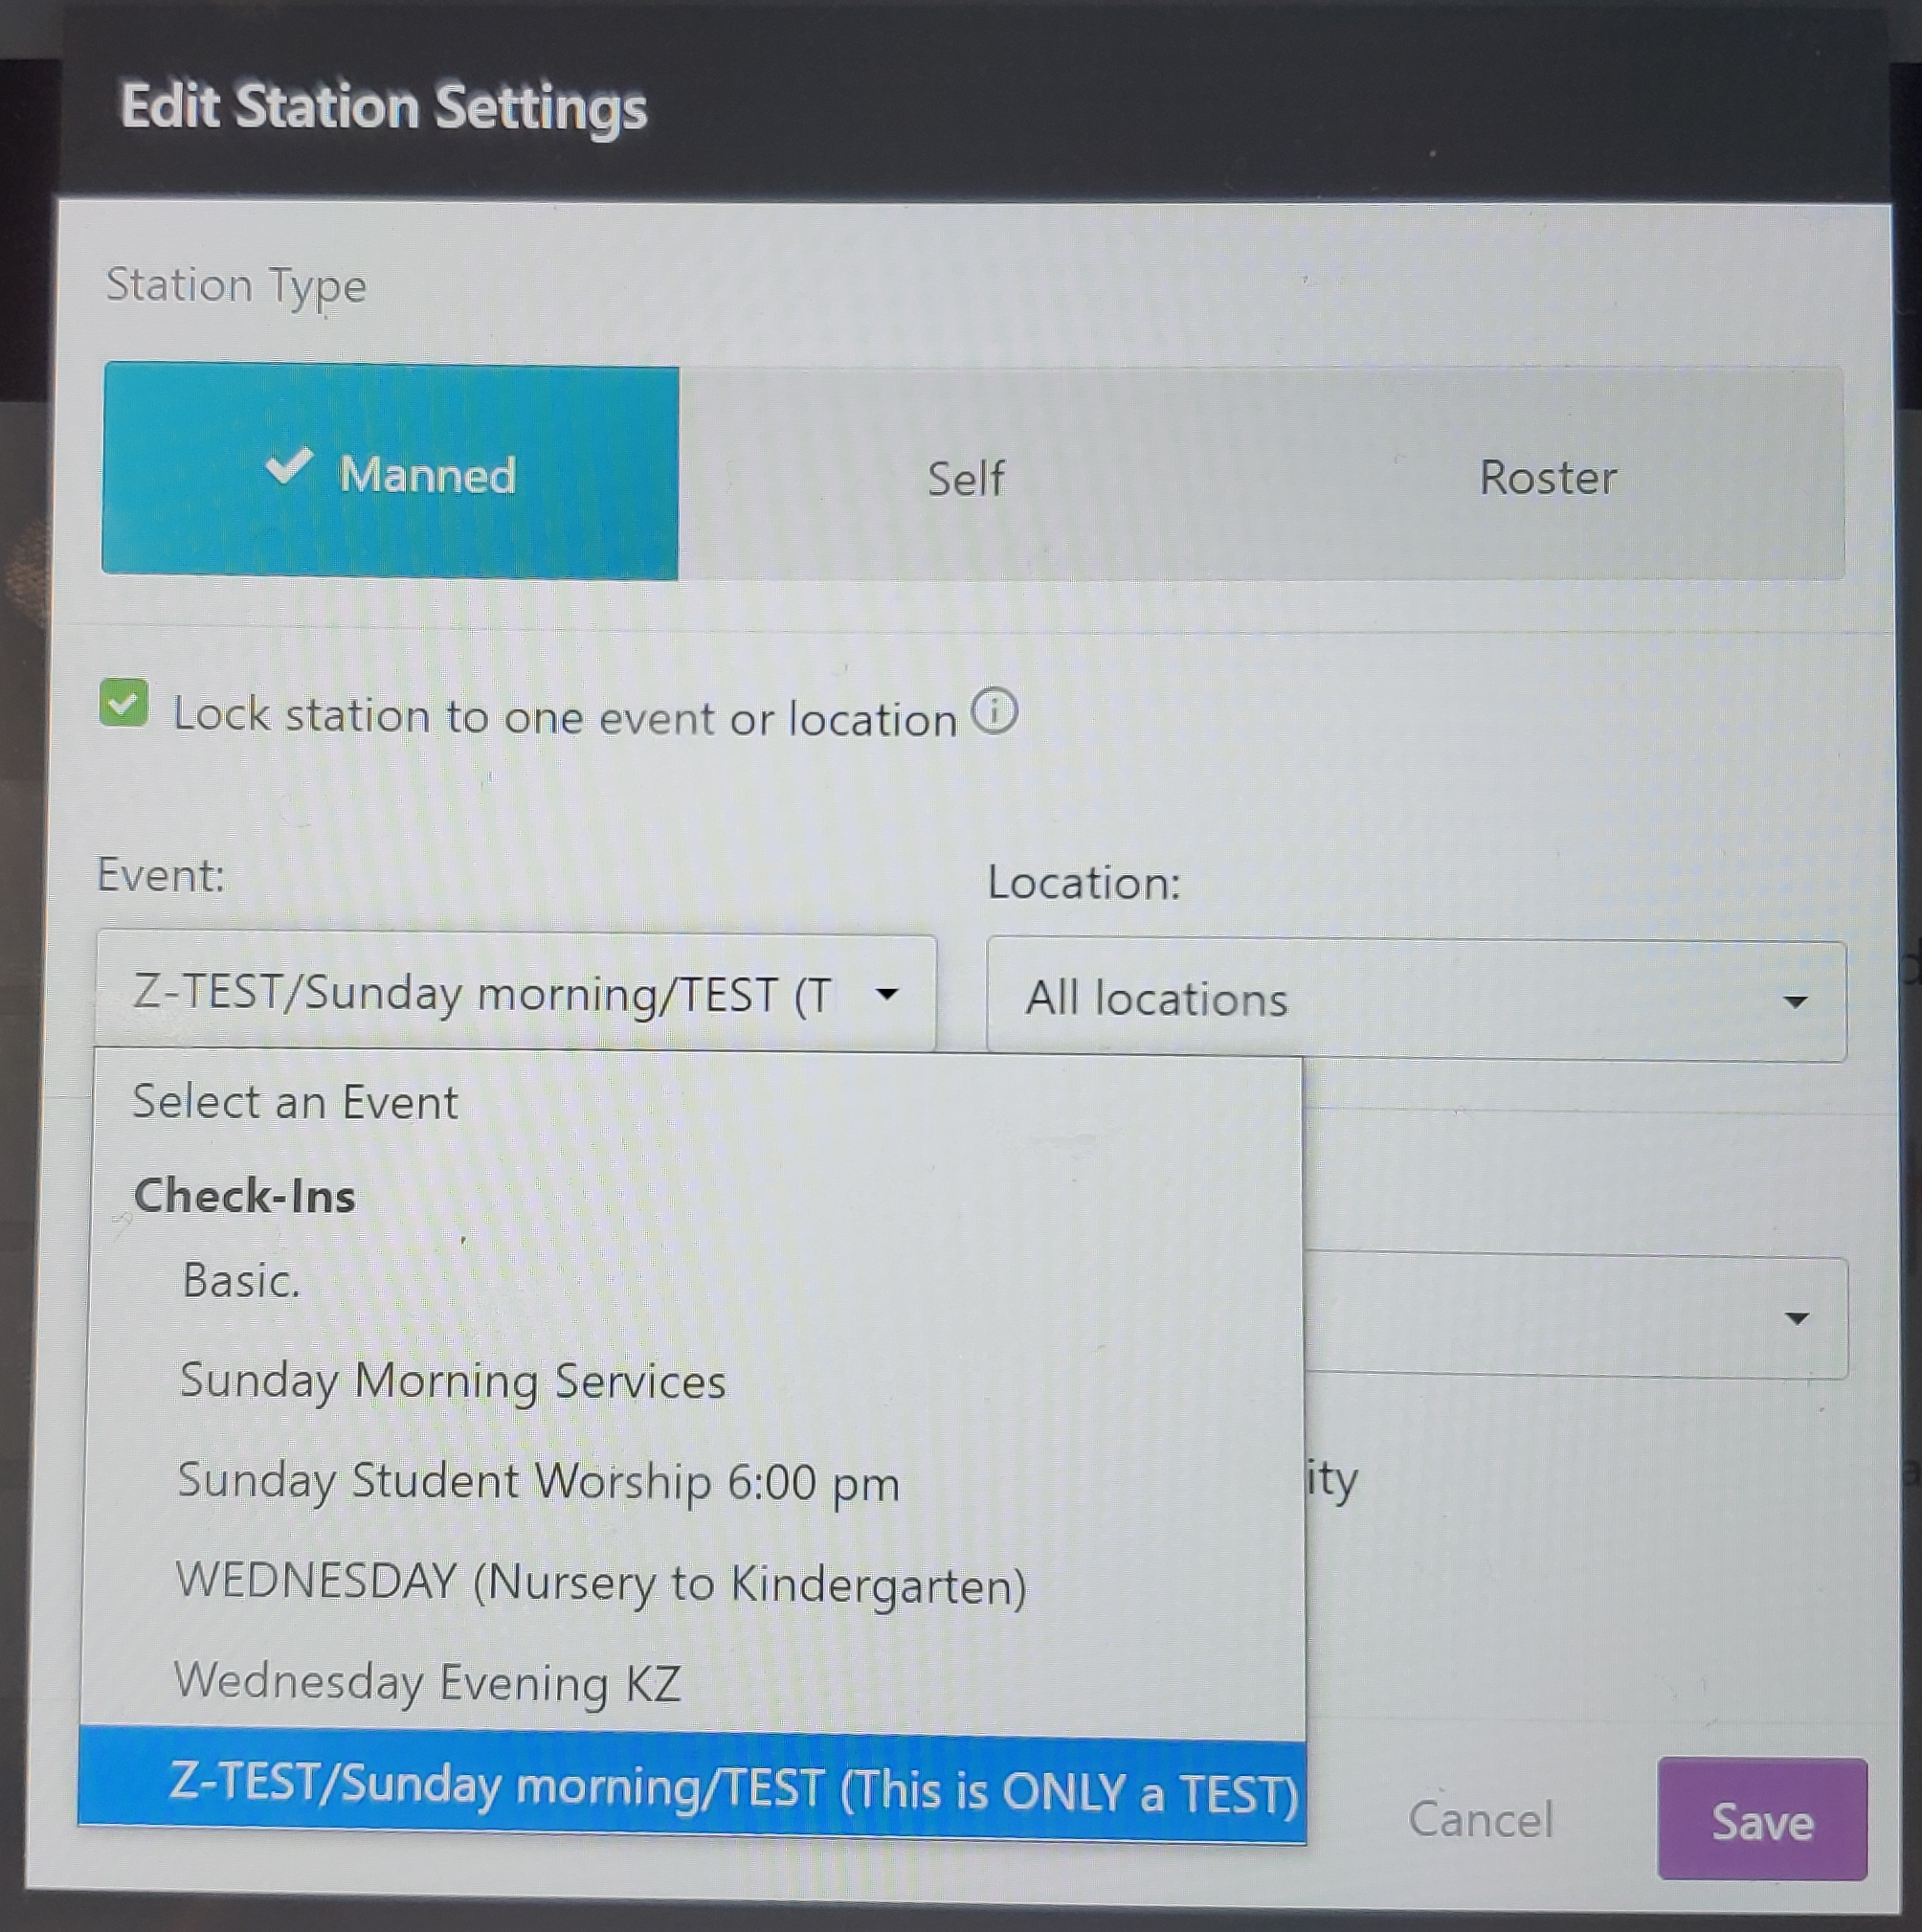 | And again, you can select which event they will be checking into. |
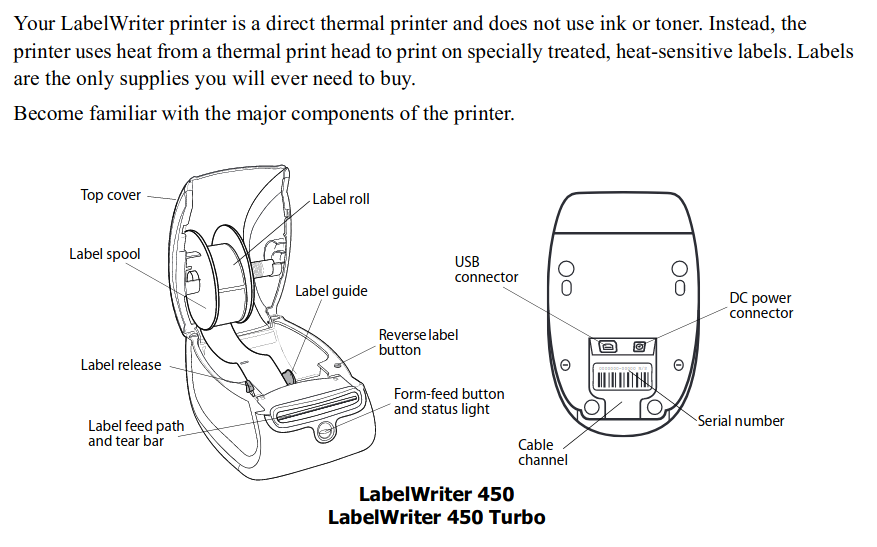
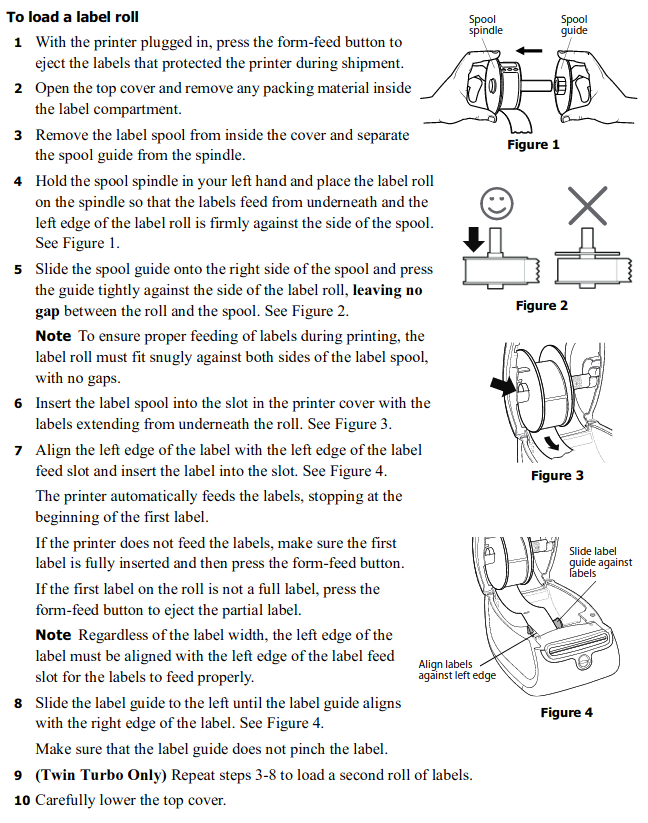
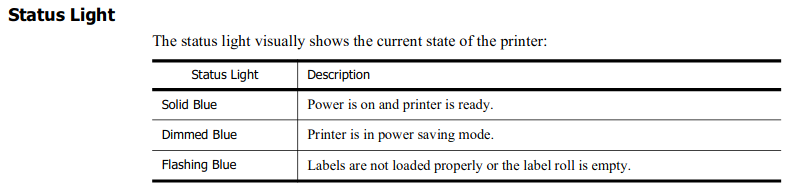
Regarding the Dymo printer, the following information was taken from https://download.dymo.com/dymo/user-guides/LabelWriter/LW450Series/UG/LabelWriter_UserGuide_en-US.pdf |
 | |
 | |
 | |
 | |